
Dell™ Inspiron™ 1100 and 5100 Service Manual
|
|
CAUTION: If you remove the hard drive from the computer when the drive is hot, do not touch the metal housing of the hard drive. |
|
|
CAUTION: Before working inside your computer, read the safety instructions in your Owner's Manual. |
 |
NOTICE: To prevent data loss, shut down your computer before removing the hard drive. Do not remove the hard drive while the computer is on, in standby mode, or in hibernate mode. |
|
NOTICE: Hard drives are extremely fragile; even a slight bump can damage the drive. |
 |
NOTE: Dell does not guarantee compatibility or provide support for hard drives from sources other than Dell. |
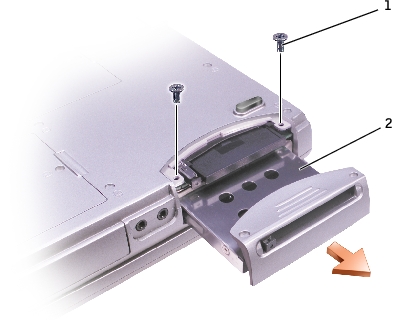
1 |
|
2 |
|
NOTICE: When the hard drive is not in the computer, store it in protective antistatic packaging. See "Protecting Against Electrostatic Discharge" in your Owner's Manual. |
Save the original packaging for storing or shipping the hard drive.
|
NOTICE: Use firm and even pressure to slide the drive into place. If you use excessive force, you may damage the connector. |