
|
2.833.244 bytes |
Service Hints & Tips |
Document ID: MNOK-424QGP |
Aptiva - 2161/2162 Reinstalling Ring Central
Applicable to: Australia, New Zealand
Warning: Uninstalling Ring Central will delete all the files in the rc500 directory. This may include saved voice or data messages and the information within your phonebook.
1. Before you start you need to insert your Blue Diagnostics CD.
2. Click on Start -> Programs -> AptivaWare -> Aptiva Installer.
3. Click on the Show Installed Programs tab.
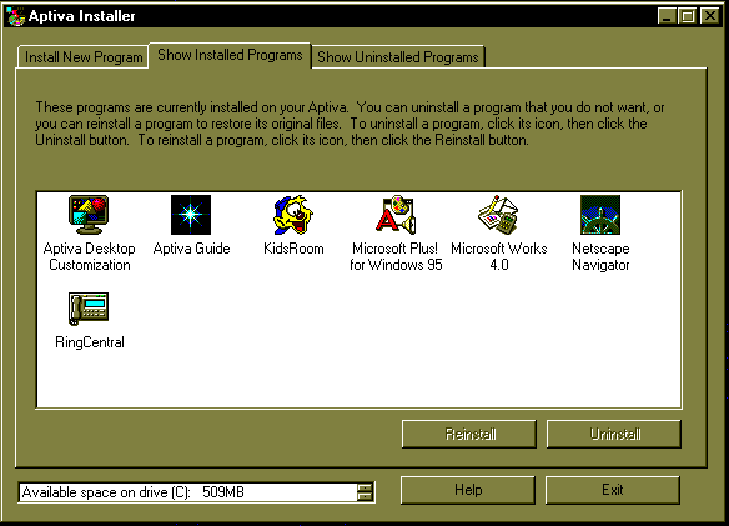
Figure 1
4. Click on the Ring Central icon once just to highlight it.
5. Click on the Uninstall button.
6. A dialog box will appear asking whether you are sure you want to remove the selected application and all its components. Choose Yes.
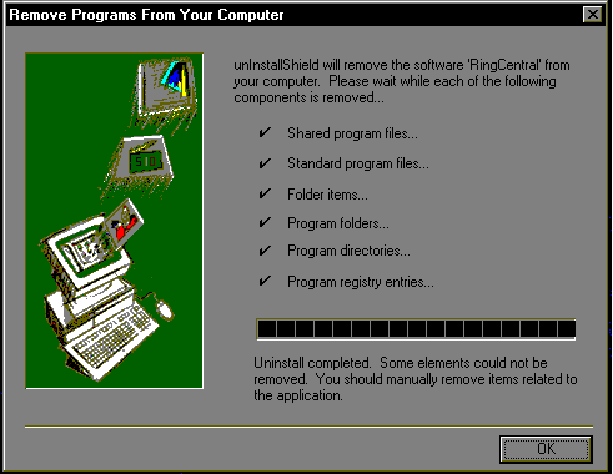
Figure 2
7. Next you will see the above screen appear. Click on OK.
8. After a few seconds, the Aptiva Installer screen will again appear. This time, Ring Central will not be listed in Show Installed Programs.
9. Click on the Show Uninstalled Programs tab.
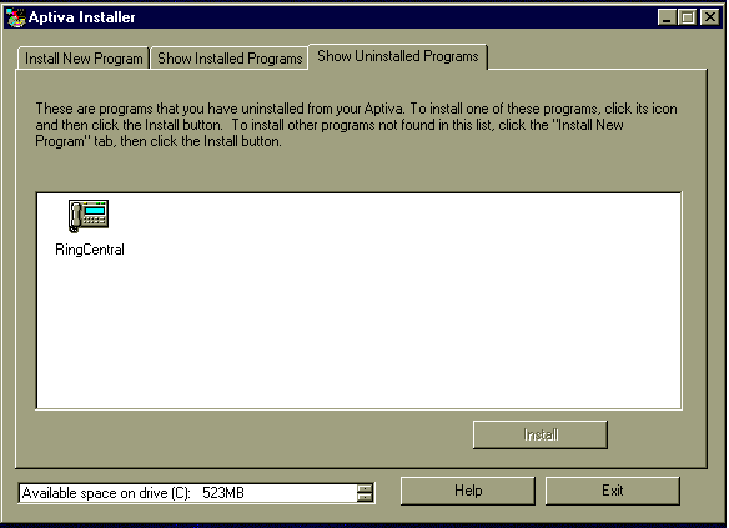
Figure 3
10. You will now see a Ring Central icon. Click on this once to highlight it.
11. Now click on the Install button.
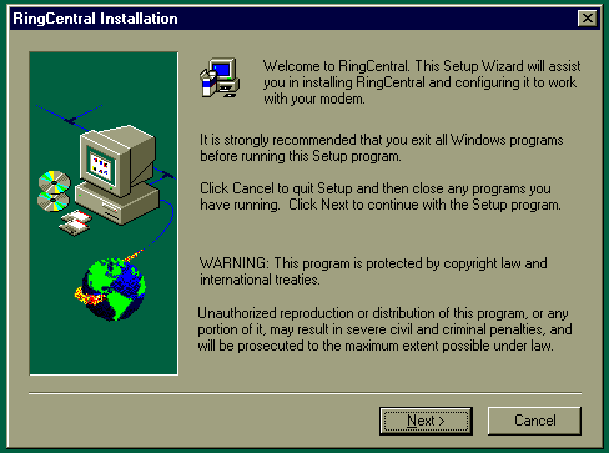
Figure 4
12. Next the above dialog box will appear. Click on the Next button to continue the installation.
13. Another dialog box will appear explaining where it is going to install the Ring Central files. C:\RC500 is the default directory. Click on Next.
14. The next dialog box will ask you which program folder you would like Ring Central to appear in. Leave it at the default setting and click on Next.
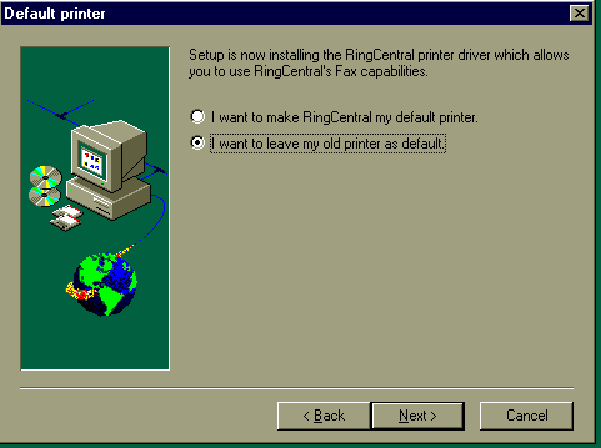
Figure 5
15. Next the dialog box in Figure 5 will appear. It is up to you whether you would like Ring Central to be your default printer or not. If you make Ring Central your default printer everytime you go to print a document, it will automatically assume that you want to fax, and will send the information to Ring Central. If you would not like it to do this, choose to leave your old printer as default. Once you have made your decision, click on Next.
16. The next dialog box will confirm the installation options you chose in the 3 previous dialog boxes. Click on the Next button to continue.
17. It will now start installing files. When it gets up to 100% you will see another dialog box stating that Ring Central installation has finished, and suggests that you restart the computer. Remove the blue Diagnostics CD, and click on Yes to restart the computer.
18. When the machine restarts, it is important that Ring Central be reinstalled from the Recovery CD.
19. To do this, click on Start -> Programs -> MS-Dos Prompt.
20. Type "cd \" and press the ENTER key.
21. Type "Deltree \rc500" and press the ENTER key.
22. Choose "Y" to delete the folder and its subdirectories.
23. Insert the red Aptiva Product Recovery CD. Type "g:" then press the ENTER key.
24. Type "cd recovery\au" then press the ENTER key.
25. Type "Restore rc500\*.*" then press the ENTER key.
26. It will give you a message saying "Restore complete".
27. Type "g:" and then press the ENTER key.
28. Type "restore windows\r0system.ini" and press the ENTER key.
29. It will give you another message saying "Restore complete".
30. Type "c:" and press the ENTER key. Type "Exit" and then press ENTER.
31. Take the red "Recovery CD" out.
The reinstallation of Ring Central is now complete. You will need to double click on the Ring Central icon on the desktop and go through the setup wizard to run the program.
|
Search Keywords |
| |
|
Hint Category |
Software Installation/Configuration | |
|
Date Created |
10-11-98 | |
|
Last Updated |
05-02-99 | |
|
Revision Date |
05-02-2000 | |
|
Brand |
IBM Aptiva | |
|
Product Family |
Aptiva | |
|
Machine Type |
2161, 2162 | |
|
Model |
E34; E64; E84; F34; F64; F84; Q3C; Q81; Q91; U81; U91 | |
|
TypeModel |
| |
|
Retain Tip (if applicable) |
| |
|
Reverse Doclinks |