
|
119.548 bytes |
Service Hints & Tips |
Document ID: YAST-3MEMM6 |
Personal Computer Floor Stand - Installation Instructions
Applicable to: World-Wide
Installing the Floor Stand:
1. Turn off all attached devices. Turn off the computer. Unplug the power cords for the computer and all attached devices.
2. Turn the computer on its side with the computer vents facing up.
3. Place a pair of installation clips at each end of the row of vents. One clip attaches to the last vent; the other clip attaches to the third vent from the end as shown in the illustration. Rotate each set of clips into the vertical position.
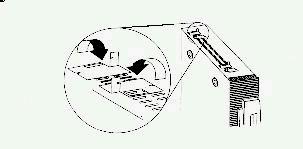
4. Push each set of installation clips together until the clips interlock. If you do not completely interlock, the installation clips, the floor-stand tabs will not fit over the installation clips.
Attention: To allow for proper computer ventilation, the front of the floor stand must be aligned with the front of the computer.
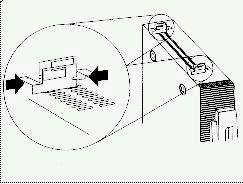
5. Align the front of the floor stand with the front of the computer and turn the floor stand upside-down. The front of the floor stand is labeled on the bottom of the stand.
6. Center the clips with either position 1or 2 on the underside of floor-stand as you push the floor stand onto the clips until they snap into place. Each set of installation clips fits inside a pair of rails at each end of the floor-stand as shown in the illustration.

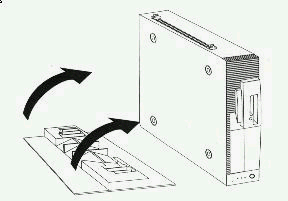
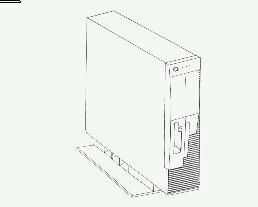
7. Position the computer for operation.
Removing the Floor Stand:
Remove the floor stand from the computer if you:
To remove the floor stand:
|
Search Keywords |
| |
|
Hint Category |
Hardware Installation/Configuration | |
|
Date Created |
30-09-97 | |
|
Last Updated |
23-03-99 | |
|
Revision Date |
23-03-2000 | |
|
Brand |
IBM Options | |
|
Product Family |
Expansion | |
|
Machine Type |
Accessory | |
|
Model |
76H3302 | |
|
TypeModel |
| |
|
Retain Tip (if applicable) |
| |
|
Reverse Doclinks |