
|
68.026 bytes |
Service Hints & Tips |
Document ID: DETR-42RPNP |
Aptiva - 2163 Removals and replacements - Processor heat sink and fan
Applicable to: World-Wide
NOTE: Installing the Processor Heat Sink and Fan
The Pentium II processor module with holes on one side to hold the clips of the heat sink and fan. The upper set of holes (near the latches) on the processor are wider and should match the wider ends of the clips on the heat sink. The lower set of holes are smaller and should match the narrow ends of the heat sink clips.
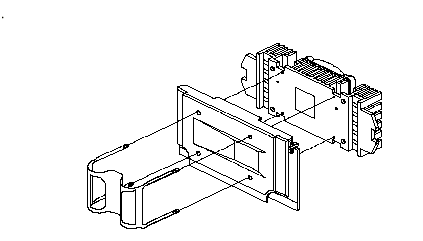
SECC1 Package Installation
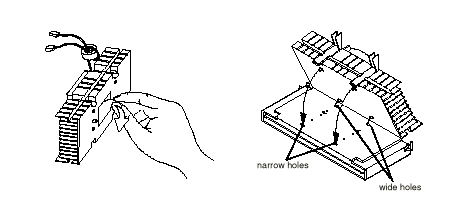
Matching the Fan-Heat Sink Clips with the Holes on the Processor and Inserting the Clip Ends to the Processor Holes
Follow these steps when installing the heat sink and fan to the Pentium II processor module:

SECC2 Package Installation
Follow these steps when installing the heat sink and fan to the Pentium II processor module:
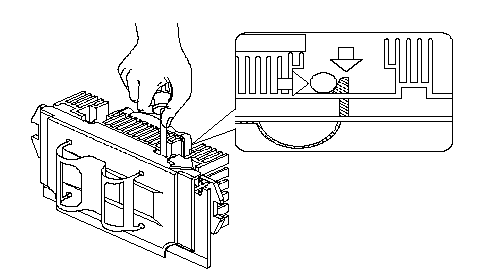
To remove the SECC2 type fan sink, use a screw driver to slide the fastener nodes outward to unlock the fan sink from the processor, then carefully remove the fan sink from the processor.
|
Search Keywords |
| |
|
Hint Category |
Processors, Hardware Installation/Configuration | |
|
Date Created |
01-12-98 | |
|
Last Updated |
02-03-99 | |
|
Revision Date |
01-03-2000 | |
|
Brand |
IBM Aptiva | |
|
Product Family |
Aptiva | |
|
Machine Type |
2163 | |
|
Model |
all | |
|
TypeModel |
| |
|
Retain Tip (if applicable) |
| |
|
Reverse Doclinks |