
|
70.947 bytes |
Service Hints & Tips |
Document ID: COBN-3G5CS3 |
Aptiva - 2162 Removals and replacements - Hard disk drives
Applicable to: World-Wide
2030 - Hard Disk Drives
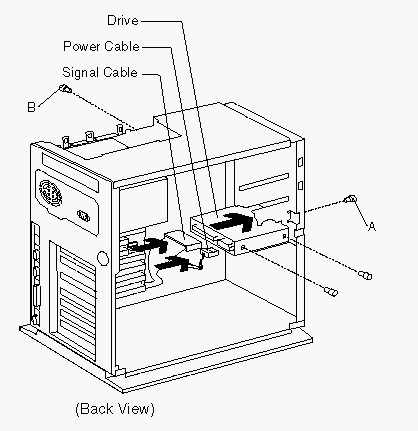
Bay4
Disconnect any cables on the drive.
Remove the screws.
Slide the hard disk drive to the rear and tilt to remove.
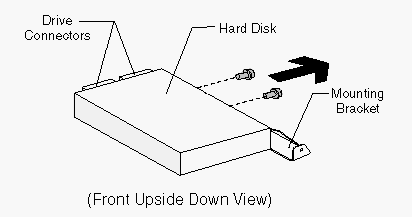
Remove the mounting bracket from the old drive and install the bracket on the replacement drive.
Note: Refer to Appendix B, Model/Monitor Configurations and FRU Part Numbersó on page B-1 of the Hardware Maintenence manual and install the correct software.

Figure 4-5. Hard Disk Drive - Bay 4

Figure 4-6. Mounting Bracket - Bay 4
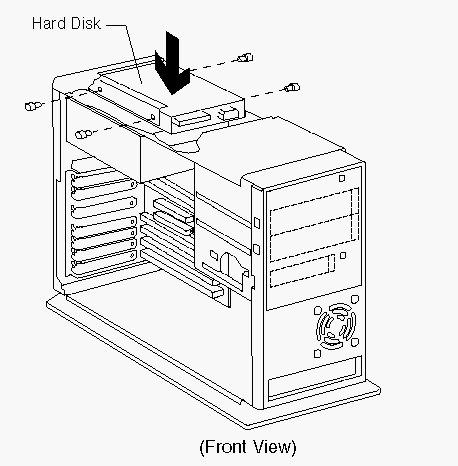
Bay5
Disconnect any cables on the drive.
Remove the screws.
Lift out the hard disk drive.

Figure 4-7. Hard Disk Drive - Bay 5
|
Search Keywords |
| |
|
Hint Category |
Hardware Installation/Configuration, Hard Drives | |
|
Date Created |
14-04-97 | |
|
Last Updated |
11-03-99 | |
|
Revision Date |
11-03-2000 | |
|
Brand |
IBM Aptiva | |
|
Product Family |
Aptiva | |
|
Machine Type |
2162 | |
|
Model |
| |
|
TypeModel |
| |
|
Retain Tip (if applicable) |
| |
|
Reverse Doclinks |