
|
206.360 bytes |
Parts Information |
Document ID: MCGN-3ZQKNN |
Netfinity 7000 M10 - Installing and Removing the Server from a Rack
Applicable to: World-Wide
Source: Hardware Maintenance Manual
Installing and Removing the Server from a Rack
During the installation procedure, you must install parts on the rack and the server. This process can be divided into two parts:
- Preparing the rack
- Installing the server in the rack

|
Caution |
In this section, you will use the following parts:
- IBM installation template
- Two slide-bracket assemblies
- One cable-management arm
- One server bracket (for attaching the cable-management arm to the server)
- Four lift handles
- Sixteen long screws (M6 by 16 mm)
- Eight short screws (M4 by 8 mm)
- Six cage nuts
- Four nut bars
- Two hex nuts (M6)
|
Attention |
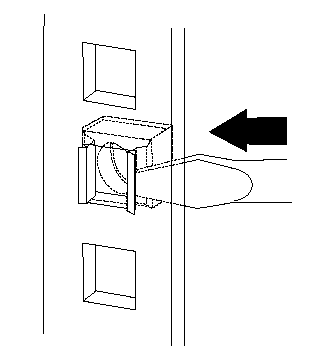
a. Position the installation template on the front mounting rails on the rack, aligning the holes.
b. Mark the holes for the slide-bracket assemblies and bezel brackets.
c. Move the template to the same U level at the rear of the server and mark the locations for the slide-bracket assemblies and cable-management arm.
d. Install the six cage nuts at the locations marked on the mounting rails for the cable-management arm and bezel brackets.
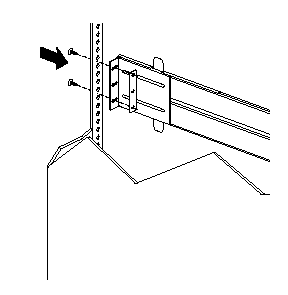
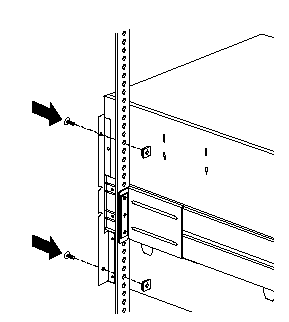
3. Attach a slide-bracket assembly to the front of the rack:
a. Position the slide-bracket assembly behind the mounting rail so that the slides will extend out from the front of the rack.
|
Notes |
b. If necessary, loosen the screws at the rear of the slide-bracket assembly and adjust the length of the slide bracket to fit the mounting rail. Tighten the screws.

c. Position a nut bar behind the slide-bracket assembly.
d. Insert two screws (M6 by 16 mm) through the mounting rail, slide-bracket assembly, and nut bar. Do not tighten the screws.
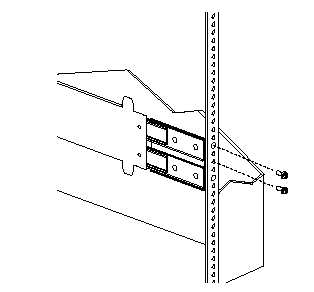
4. Attach the slide-bracket assembly to the rear of the rack:
a. Position the slide-bracket assembly inside the mounting rail.
b. Position a nut bar behind the slide-bracket assembly.
c. Insert two screws (M6 by 16 mm) through the mounting rail, slide-bracket assembly, and nut bar. Do not tighten the screws.
5. Attach the other slide-bracket assembly to the front and rear of the rack.
6. Push the slide-bracket assemblies to the outermost positions on the rack.
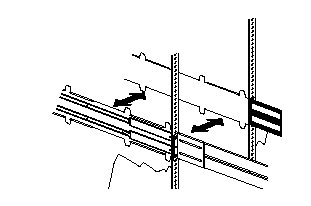
7. Tighten all screws to secure both slide-bracket assemblies. If you are using a torque screwdriver, use the following torque setting: 8-11 Nm (70.8-97.0 in/lbs).
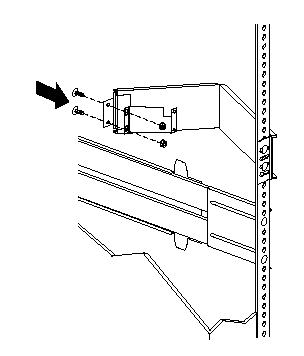
8. Attach the cable-management arm to the rear of the rack:
a. Position the cable-management arm bracket on the outside of the mounting rail.
b. Insert two screws (M6 by 16 mm) through the cable-management arm bracket, mounting rail, and cage nuts. Tighten the screws.
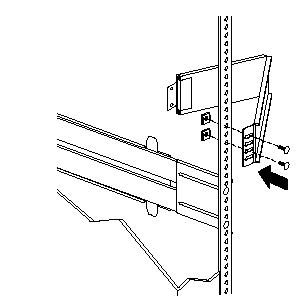
c. Position the server bracket on the cable-management arm.
d. Insert two screws (M6 by 16 mm) through the cable-management arm and the server bracket. Tighten the screws.
Installing the Server in the Rack: In this section, you will use eight screws (M4 by 8 mm) and four screws (M6 by 16mm).
To install the server in the rack:
1. Fully extend the slide-bracket assemblies until they lock.
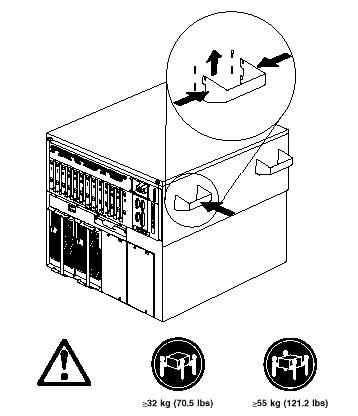
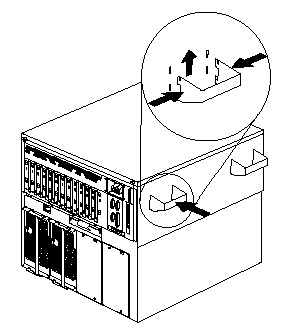
2. Install the four lift handles on the sides of the server.
a. Press in on the sides of the lift handle near the tabs and insert the handle tabs into the slots on the sides of the server.
b. Move the handle up in the slots so that the hooked part of each tab is inside the server. Release the pressure on the sides of the handle.
c. Install the remaining three lift handles.
|
Caution |
|
Note |
7. Press the safety latches and slide the drawer about halfway into the rack.
8. Attach the cable-management arm to the server using the captive screws.
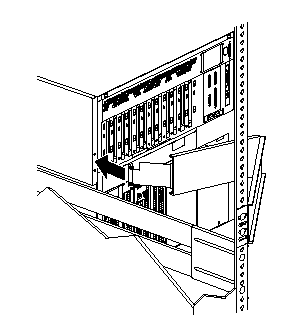
9. Attach the monitor, keyboard, and power cables to the corresponding connectors on the server. Refer to the rack documentation for instructions.
10. Attach the cables to the cable-management arm using cable ties.
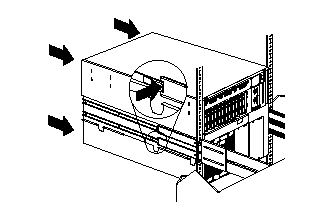
11. Secure the server in the rack:
a. Slide the drawer into the rack.
b. Secure the server to both sides of the rack by inserting two screws (M6 by 16 mm) through the bezel brackets, mounting rails, and cage nuts.
|
Note |
12. Install the rack front door.
13. To complete the installation, refer to the documentation that comes with the rack.
Removing the Server from a Rack
|
Before you begin |
|
Note |
|
Caution |
10. Lift the server from the slide bracket assemblies and place the server on a flat, nonconductive surface.
Disassembling the Drawer Hardware: If you are not going to reinstall the server or install another drawer model, remove the brackets from the server and the rack.
1. Remove Save the slide-bracket assemblies and screws for future use.
2. Remove the chassis brackets from the sides of the server.
3. Remove the screws that attach the left slide rail to the front and rear mounting rails.
4. Remove the screws that attach the right slide rail to the front mounting brackets.
5. Remove the screws that attach the slide rail and cable-management arm to the rear of the rack.
6. Refer to the documentation that comes with the rack for additional instructions.
|
Search Keywords |
| |
|
Document Category |
Rack/Storage Enclosures | |
|
Date Created |
29-10-98 | |
|
Last Updated |
02-02-99 | |
|
Revision Date |
02-02-2000 | |
|
Brand |
IBM PC Server | |
|
Product Family |
Netfinity 7000 M10 | |
|
Machine Type |
8680 | |
|
Model |
all | |
|
TypeModel |
| |
|
Retain Tip (if applicable) |
| |
|
Reverse Doclinks |