
|
102.596 bytes |
Service Hints & Tips |
Document ID: MNOK-3ZXQUE |
Aptiva - 2136 Removals and replacements - Bays 1, 2, 3 (5.25-In. Internal /External Bays)
Applicable to: World-Wide
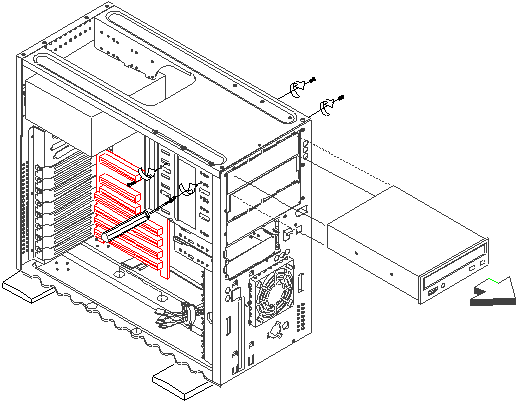
- Disconnect any cable on the drive (note location of cables).
- Remove the screws.
- Pull out the drive.

Figure 4- 3 Bay 1 (5.25-In.)
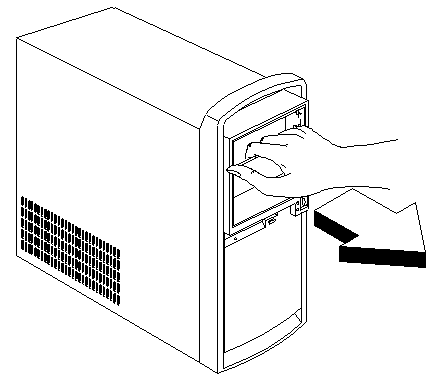
To remove the front panel's drive bay cover:
- Hold on to the bay cover as shown in the illustration.
- Gently pull outward until the drive bay cover snap from its place.

Figure 4- 4 Remove the Bay Cover
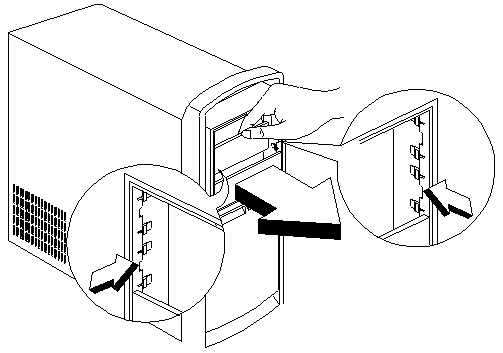
To reinstall the front panel's drive bay cover:
Before installing the drive bay cover, check the clippings on both side of the cover. You will notice that one is shorter than the other. The drive bay cover is designed so that it will only fit one way. The shorter clipping should go to the left while the longer clipping goes to the right.
- Place the drive bay cover behind the front panel. Or if the front panel is attached to the housing, place the drive bay cover inside the front panel as shown in the illustration.
- Make sure that the shorter clipping is on the left side of the front panel otherwise the drive bay cover won't fit.
- Gently pull the drive bay cover until it snaps in place.

Figure 4- 5 Reinstall the Bay Cover
|
Search Keywords |
| |
|
Hint Category |
Hardware Installation/Configuration, Hard Drives, CD-ROM Drives, Diskette Drives | |
|
Date Created |
05-11-98 | |
|
Last Updated |
11-01-99 | |
|
Revision Date |
11-01-2000 | |
|
Brand |
IBM Aptiva | |
|
Product Family |
Aptiva | |
|
Machine Type |
2136 | |
|
Model |
All | |
|
TypeModel |
| |
|
Retain Tip (if applicable) |
| |
|
Reverse Doclinks |