
|
593.972 bytes |
Service Hints & Tips |
Document ID: GSMH-3DKJUD |
TP Selectadock II - Removal and Replacement
Applicable to: World-Wide
Removal and Replacement:
This section contains information on removals and replacements, as well as locations.
The arrows in the removals and replacements show the direction of movement to remove a field replaceable unit (FRU), or to turn a screw to release the FRU. The arrows are marked in numeric order to show the correct sequence of removal.
When other FRUs must be removed before the failing FRU is removed, they are listed at the top of the page. Go to the removal procedure for each FRU listed, remove the FRU, and then continue with the removal of the failing FRU.
To replace a FRU, reverse the removal procedure and follow any notes that pertain to replacement. See 'Locations— for internal cable connections and arrangement information.
In addition to the safety notices below, refer to the Hardware Maintenance Manual for the computer you are servicing.
Caution:
Before removing any FRU, power-off the SelectaDock Docking System, remove the computer, unplug all power cords from electrical outlets, and then disconnect any interconnecting cables.
Warning:
The main board, adapters, and circuit boards on the drives are sensitive to, and can be damaged by, electrostatic discharge. You must use an electrostatic discharge (ESD) strap to establish personal grounding.
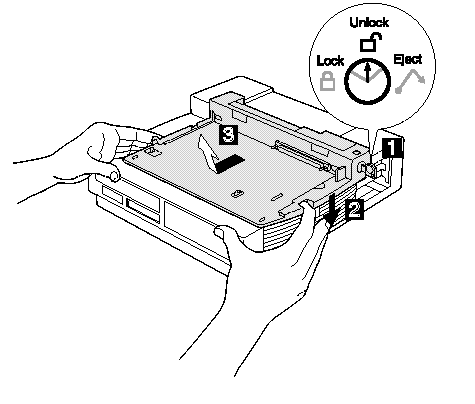
1010 Base Model:
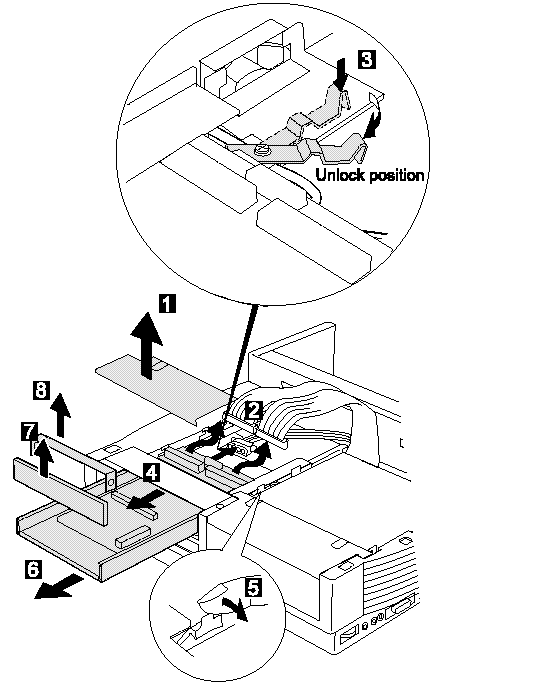
Make sure that the security key is set to the Unlock position 1 and release the latch 2 ; then undock the Base Model.
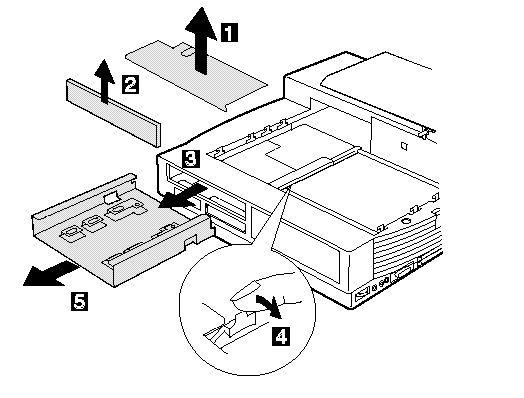
1020 Option Card Cover / Option Card:
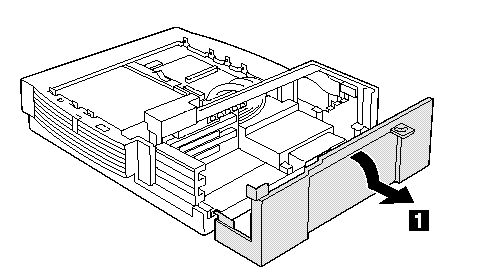
If an option card is installed, remove it.
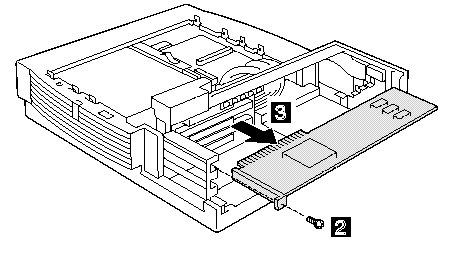
1030 PC Card:
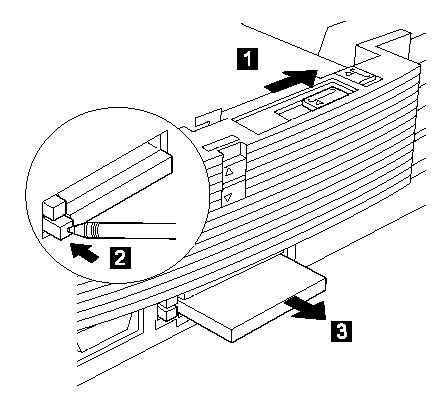
1040 1-Inch-High Bay:
Base Model (1010)
The customer can install the ThinkPad option by using the UltraBay tray and HDD, FDD, or CD-ROM by using the device tray in the 1-inch-high bay.
Remove the devices that are installed in the bay; then remove the UltraBay tray or device tray as follows:
Attention:
A hard disk or a diskette drive is sensitive to physical shock. Be careful not to drop or apply any shock to these devices.
UltraBay Tray:
Device Tray:
1050 Half-Height Bay Frame:
Base Model (1010)
1060 Upper Cover:
Base Model (1010)
Rear Panel / Option Card Cover (1020)
1-Inch-High Bay (1040)
Half-Height Bay Frame (1050)
Caution:
Make sure all power cords are unplugged before you remove the upper cover. After removing the upper cover, you might easily touch the high voltage part. Unplug the power cord before removing the upper cover for safety.

|
Step |
Length (Quantity) |
Memo |
|
1 |
M 2.6 x 5 mm (2) | |
|
2 |
M 2.6 x 5 mm (1) |
Flat head |
|
3 |
M 2.6 x 2.5 mm (1) | |
|
4 |
M 2.6 x 5 mm (2) | |
|
6 |
M 2.6 x 5 mm (2) |
Self-tap |
|
7 |
M 2.6 x 5 mm (2) |
Black |
|
8 |
M 2.6 x 8 mm (2) |
Black |
|
9 |
M 2.6 x 8 mm (3) |
Self-tap |

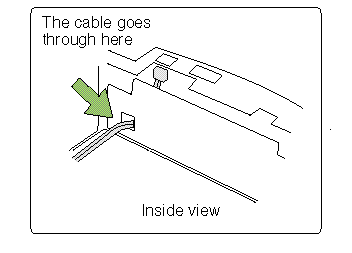
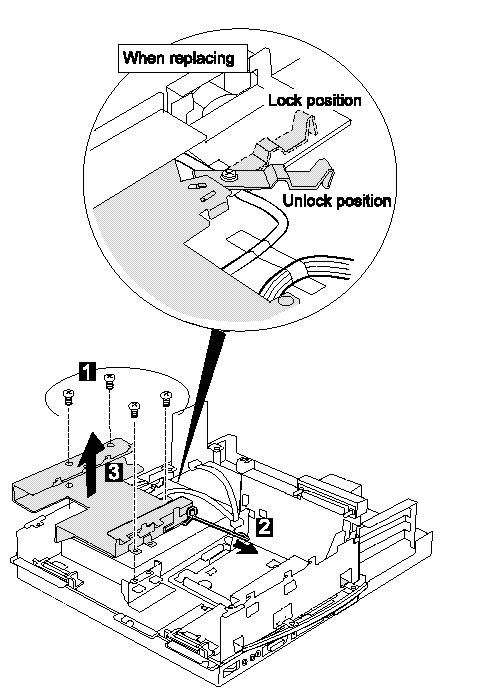
When replacing:
The following figure shows the route of the microphone cable:
1070 Bracket:
Base Model (1010)
Rear Panel / Option Card Cover (1020)
1-Inch-High Bay (1040)
Half-Height Bay Frame (1050)
Upper Cover (1060)
|
Step |
Length (Quantity) |
Memo |
|
1 |
M 2.6 x 5 mm (4) |
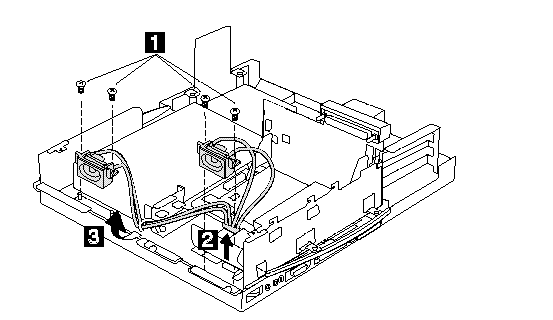
1080 Speaker Assembly:
Base Model (1010)
Rear Panel / Option Card Cover (1020)
1-Inch-High Bay (1040)
Half-Height Bay Frame (1050)
Upper Cover (1060)
Bracket (1070)
|
Step |
Length (Quantity) |
Memo |
|
1 |
M 2.6 x 7 mm (4) |
Self-tap |
1090 Power Supply:
Base Model (1010)
Rear Panel / Option Card Cover (1020)
1-Inch-High Bay (1040)
Half-Height Bay Frame (1050)
Upper Cover (1060)
Bracket (1070)
|
Step |
Length (Quantity) |
Memo |
|
1 |
M 2.6 x 5 mm (4) |
1100 Cables:
Base Model (1010)
Rear Panel / Option Card Cover (1020)
1-Inch-High Bay (1040)
Half-Height Bay Frame (1050)
Upper Cover (1060)
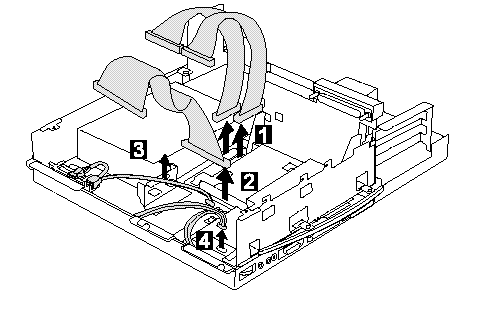
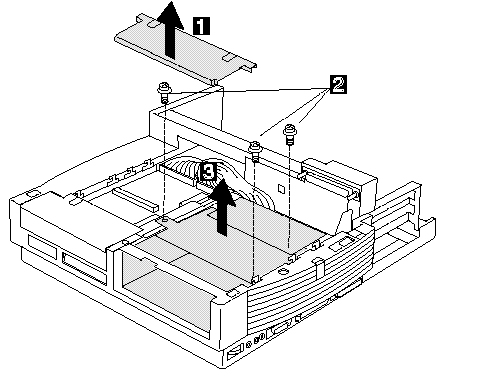
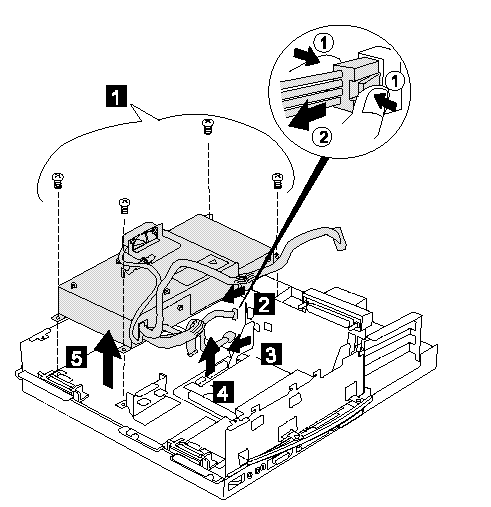
This step is a preparation for removing the main card assembly. Remove the IDE cables 1 , the SCSI cable 2 , and the audio cable 3 ; then disconnect the speaker connector 4.
1110 Shield Cover:
Base Model (1010)
Rear Panel / Option Card Cover (1020)
1-Inch-High Bay (1040)
Half-Height Bay Frame (1050)
Upper Cover (1060)
Bracket (1070)
|
Step |
Length (Quantity) |
Memo |
|
1 |
M 2.6 x 7 mm (3) | |
|
2 |
M 2.6 x 6 mm (5) | |
|
3 |
M 1.5 x 6 mm (1) |
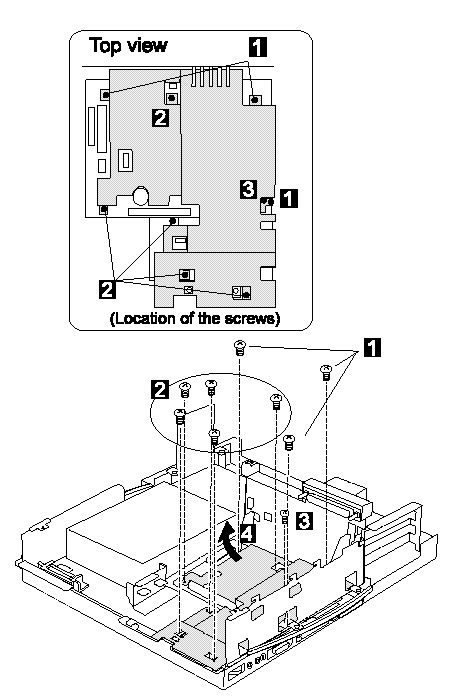
1120 Main Card Assembly:
Base Model (1010)
Rear Panel / Option Card Cover (1020)
1-Inch-High Bay (1040)
Half-Height bay Frame (1050)
Upper Cover (1060)
Bracket (1070)
Cables (1100)
Shield Cover (1100)
|
Step |
Length (Quantity) |
Memo |
|
1 |
M 2.6 x 5 mm (1) | |
|
2 |
M 2.6 x 3 mm (1) | |
|
4 |
M 2.6 x 5 mm (3) |
Self-tap |
|
5 |
M 1.5 x 6 mm (1) | |
|
6 |
M 2.6 x 5 mm (2) | |
|
7 |
M 2 x 7 mm (2) |
Hex head (5 m/m) |
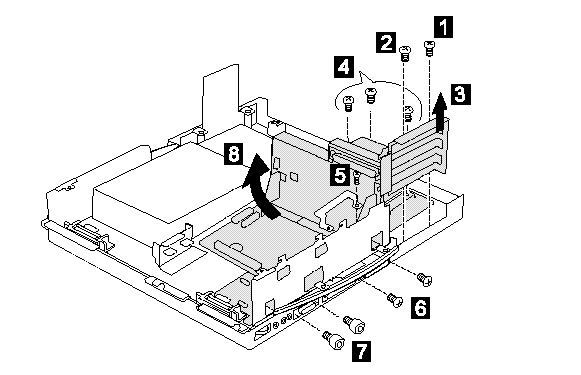
1130 Audio Card / Main Card / Riser Card:
Base Model (1010)
Rear Panel / Option Card Cover (1020)
1-Inch-High Bay (1040)
Half-Height Bay Frame (1050)
Upper Cover (1060)
Bracket (1070)
Cables (1100)
Shield Cover (1100)
Main Card Assembly (1120)
1: To remove the Audio card
2: To remove the Riser card
1,2: To remove the Main Board
Note:
In step 2 , use a tool such as a bladed screwdriver to easily disconnect the riser card and main card. Be careful not to damage the connector.

|
Search Keywords |
| |
|
Hint Category |
Hardware Maintenance Information | |
|
Date Created |
22-01-97 | |
|
Last Updated |
27-08-98 | |
|
Revision Date |
21-08-99 | |
|
Brand |
IBM ThinkPad | |
|
Product Family |
ThinkPad Docking Stations | |
|
Machine Type |
3547 | |
|
Model |
002 | |
|
TypeModel |
| |
|
Retain Tip (if applicable) |
N/A | |
|
Reverse Doclinks |