
|
100.523 bytes |
Service Hints & Tips |
Document ID: PMYS-3LLL5M |
Aptiva - 2137 Removals and replacements - Bays 4, 5 (3.5" diskette/hard disk drives)
Applicable to: World-Wide
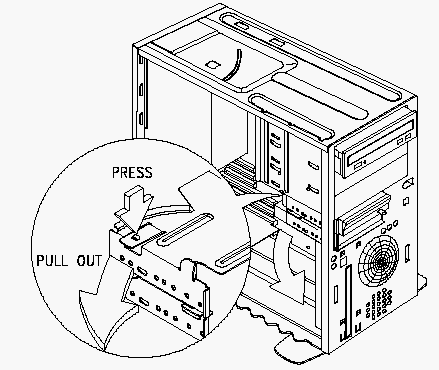
1. Disconnect the cables (note location of cables).
2. Press the lever and rotate outward.
3. Pull carefully and slowly as soon as the warning arrow appears.
4. The drive frame becomes free after the line behind the arrow appears. Remove the frame from the chassis.
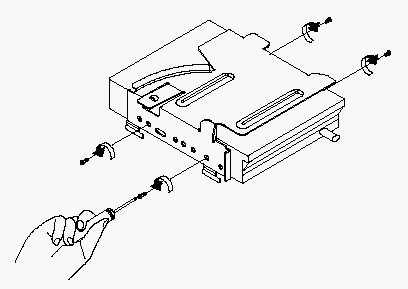
5. Remove screws for drive, then pull the drive out.
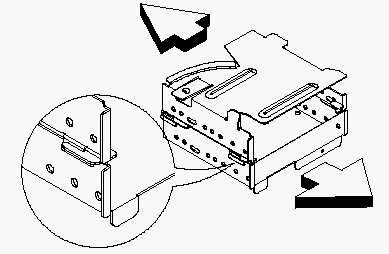
6. If upper and lower frames needs to be detached, refer to figure below
NOTE: Reinstall The 3.5-in Drive Frame
1. Before reinstalling the drive frame into the main unit, make sure the upper and lower drive frames are properly reattached.
2. Align the front notch of the drive frame with the system chassis
3. Align the top rail of the drive frame with the system chassis and swing inward until "click" to locked.
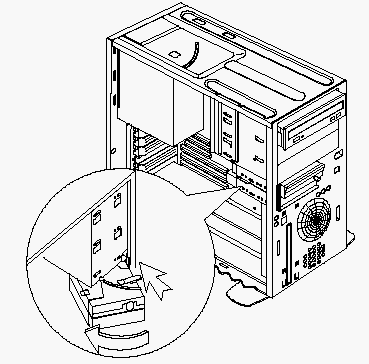
4. Re-attach the power and signal cables to the drives.
|
Search Keywords |
| |
|
Hint Category |
Hardware Installation/Configuration, Hard Drives, Diskette Drives | |
|
Date Created |
04-09-97 | |
|
Last Updated |
18-02-99 | |
|
Revision Date |
18-02-2000 | |
|
Brand |
IBM Aptiva | |
|
Product Family |
Aptiva | |
|
Machine Type |
2137 | |
|
Model |
All | |
|
TypeModel |
| |
|
Retain Tip (if applicable) |
| |
|
Reverse Doclinks |