

|
317.072 bytes |
Parts Information |
Document ID: DDSE-42ZPW7 |
Netfinity 5500 - Using the ServeRAID Administration Functions
Applicable to: World-Wide
Using the ServeRAID Administration Functions:
This section describes how to administer your ServeRAID controller using the following functions:
- Array Administration
- Logical Drive Administration
- Logical Drive Migration Administration
- Physical Device Administration
- ServeRAID Controller Administration
Array Administration: This section contains instructions for creating a disk array and deleting a disk array using the ServeRAID Administration and Monitoring utility program.
Creating Disk Arrays
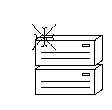
Disk arrays provide access to hard disk drives in a logical manner. Hard disk drives are grouped in a disk array, and divided into logical drives for access by the operating system.
To create a disk array:
1. Click on the  icon on the tool bar or select Manage Disk Arrays from the Advanced pull-down menu; then, select Create Disk Array.
A screen similar to the following appears.
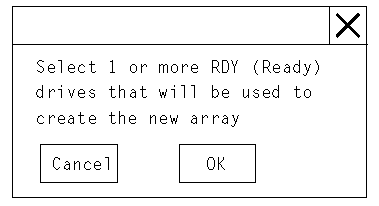
2. Select one or more Ready (RDY) drives for the new disk array.
To select a RDY drive, click on the desired RDY button from the device area. A disk array identifier appears beside each RDY drive added to the disk array.
If you change your mind about a selected drive, select the button again to remove the selected drive from the disk array.
3. Click on OK to define a logical drive for the new array.
A screen similar to the following appears.

4. Select the RAID level that you want to assign to the logical drive from the pull-down list.
The RAID levels available depend on the number of hard disk drives that you select for the disk array.
- If you have one hard disk drive, the logical drive can be only RAID level 0.
- If you have two or more hard disk drives, the logical drive can be RAID level 0 or 1.
- If you have three or more hard disk drives, the logical drive can be RAID level 0, 1, or 5.
5. Type the size, in megabytes, that you want to assign to the logical drive in the Requested Space entry field.
|
Notes: |
|
Note |
 Deleting a disk array deletes all logical drives that are defined in that array. All data and programs in the disk array are lost during this procedure.
|
Note |
|
Attention |
To delete a disk array:
1. Click on the  icon on the tool bar or select Manage Disk Arrays from the Advanced pull-down menu; then, select Delete Disk Array.
A screen similar to the following appears.
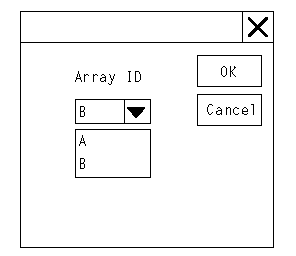
2. Select the disk array ID that you want to delete from the pull-down list.
3. Click on OK to delete the disk array.
Logical Drive Administration: This section contains instructions for creating a logical drive, initializing and synchronizing a logical drive, and accessing blocked logical drives using the ServeRAID Administration and Monitoring utility program.
Creating Logical Drives
 You must create at least one logical drive for each disk array. You can create up to eight logical drives.
If you plan to use the logical-drive migration (LDM) feature, do not create more than seven logical drives. The LDM procedure requires one free logical drive to perform the migration. See "Logical Drive Migration Administration" for more information.
To create a logical drive:
1. Click on the  icon on the tool bar or select Manage Logical Drive from the Advanced pull-down menu; then, select Create Logical Drive.
A screen similar to the following appears.
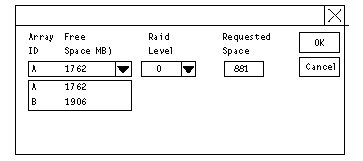
2. Select the disk array ID for which you want to create a logical drive.
3. Select the RAID level that you want to assign to the logical drive from the pull-down list.
The RAID levels available depend on the number of hard disk drives that you select for the disk array.
Notes:
a. If you have one hard disk drive, the logical drive can be only RAID level 0.
b. If you have two or more hard disk drives, the logical drive can be RAID level 0 or 1.
c. If you have three or more hard disk drives, the logical drive can be RAID level 0, 1, or 5.
d. If you plan to use the Change RAID Level feature of logical drive migration, you must assign the same RAID level to all of the logical drives in the array. See "Changing RAID Levels" for more information.
4. Type the size, in megabytes, that you want to assign to the logical drive in the Requested Space entry field.
Notes:
a. The Requested Space default value is calculated as the maximum logical drive size available for the RAID level assigned.
b. The Requested Space must be between 2 MB and the maximum available.
c. The actual logical drive size that appears might be slightly different from what you type in the Requested Space field.
The size of a logical drive is determined by the RAID level and the number of hard disk drives. For example, a disk array consisting of three, 1 GB hard disk drives with a requested RAID level 0 drive of 1000 MB will actually contain only 999 MB because the data is striped across all three drives, with 333 MB on each drive.
5. Click on OK to create the logical drive.
6. You must initialize all new logical drives before storing data in them. Continue with "Initializing Logical Drives".
|
Note |
Initializing Logical Drives: Initializing a logical drive erases the first 1024 sectors on the drive and prevents access to any data previously stored on that drive. You must initialize all new logical drives before storing data in them.
To initialize a logical drive:
1. Select the logical drive that you want to initialize from the Main Screen of the Administration and Monitoring utility program.
A screen similar to the following appears.
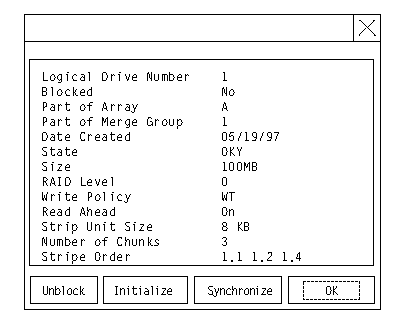
2. Click on Initialize to initialize the drive.
|
Note |
Synchronizing a logical drive verifies that the data redundancy for the logical drive is correct. For RAID level 5, the parity bit is computed and then written to the parity drive.
To synchronize a logical drive:
1. Select the logical drive that you want to synchronize from the Main Screen of the Administration and Monitoring utility program.
A screen similar to the following appears.
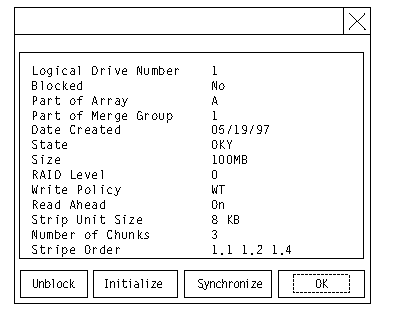
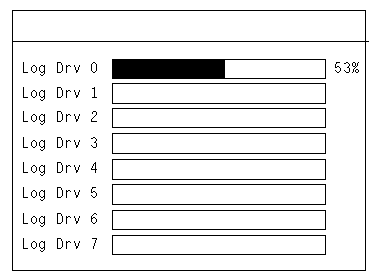
2. Click on Synchronize to synchronize the drive.
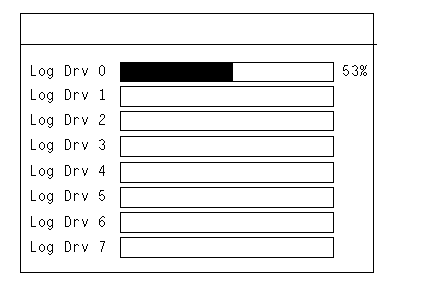
The synchronization process begins and reports progress information on the screen.
|
Note |
Unblocking Logical Drives: Whenever the ServeRAID controller performs a rebuild operation on an array, the data stored in any RAID level 1 and RAID level 5 logical drives in the array is reconstructed. However, the data stored in RAID level 0 logical drives in that array cannot be reconstructed. The data in the RAID level 0 logical drives is blocked when the ServeRAID controller detects that the array is valid, but the data might be damaged.
After the rebuild process completes, you can unblock the RAID level 0 logical drives; this redefines their state as OKY and allows access to them once again. But remember, the RAID level 0 logical drive might contain damaged data. You must re-create, install, or restore the data for the RAID level 0 logical drive from the most recent backup disk or tape.
To unblock a blocked drive:
1. Select the logical drive that is blocked from the Main Menu of the Administration and Monitoring utility program.
A screen similar to the following appears.
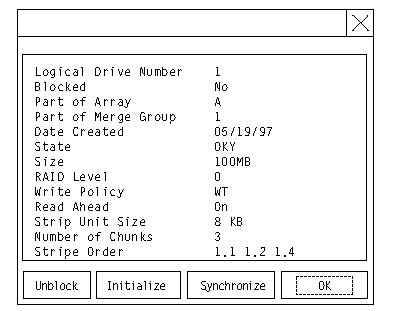
2. Click on Unblock to unblock the drive.
3. You must initialize all new logical drives before storing data in them. See "Initializing Logical Drives".
4. Restore the data to the drive from your most recent backup disk or tape.
Logical Drive Migration Administration: The logical drive migration (LDM) feature dynamically changes the current logical drive structure. You can use this feature to change the RAID level, increase the free space in a disk array, or change the size of a logical drive.
To use the LDM feature, you must have two logical drives available: one free (FRE) logical drive and one source logical drive that is in the okay (OKY) state. During the LDM procedure, the ServeRAID controller changes the state of the FRE logical drive to SYS; then, temporarily uses the SYS drive to perform the migration. When the migration procedure completes, the ServeRAID controller changes the state of the SYS drive back to FRE.
Changing RAID Levels:

You can change (migrate) the RAID levels of currently defined logical drives. Depending upon the current RAID level, you might need to add or remove a hard disk drive before you can change the RAID level.
To use the Change RAID Level feature, all of the logical drives within the array must be the same RAID level.
The ServeRAID controller supports changing RAID levels as follows:
- Change two RAID level 0 logical drives to RAID level 5 by adding one hard disk drive
- Change two RAID level 1 logical drives to RAID level 5 by adding one hard disk drive
- Change from RAID level 5 to RAID level 0 by removing one hard disk drive
To change the RAID level:
1. Click on the  icon on the tool bar or select Manage Disk Arrays from the Advanced pull-down menu; then, select Logical Drive Migration.
A screen similar to the following appears.
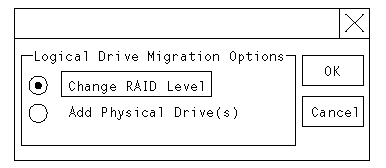
2. Select Change RAID Level; then, click on OK.
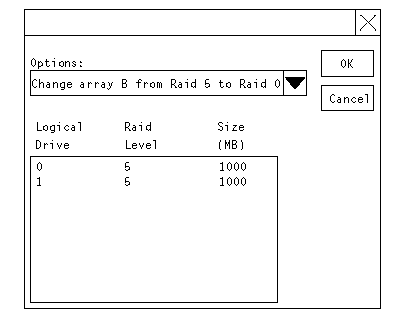
3. Select a migrating option from the pull-down list.
|
Note |
|
Note |
 You can expand currently defined arrays to new sizes by adding one to three new hard disk drives.
The ServeRAID controller supports adding new space to a disk array as follows:
- You can increase the free space in a disk array without adjusting the size of the logical drives. This is useful when you need to add logical drives to your existing disk arrays. Refer to the following illustration.

For example, an existing disk array uses three, 2150 MB hard disk drives that are configured as two RAID level 5 logical drives (one 500 MB and one 1000 MB) and 2800 MB of free space. If you use the logical-drive migration procedure and add a 2150 MB hard disk drive to increase the amount of free space, the end result will be two RAID level 5 logical drives (one 500 MB and one 1000 MB) and 4950 MB of free space.
- You can increase the size of all the logical drives proportionally in a disk array. This is useful when you want to increase the size of the currently defined logical drives. Refer to the following illustration.

For example, an existing array uses three 2150 MB hard disk drives that are configured as two RAID level 5 logical drives (one 500 MB and one 1000 MB) and 2800 MB of free space. If you use the logical-drive migration procedure and add a 2150 MB hard disk drive to proportionally increase the size of the disk array, the end result will be two RAID level 5 logical drives (one 750 MB and one 1500 MB) and 4200 MB of free space.
To add a physical drive:
1. Click on the  icon on the tool bar or select Manage Disk Arrays from the Advanced pull-down menu; then, select Logical Drive Migration.
A screen similar to the following appears.
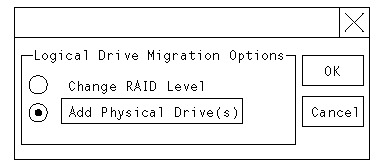
2. Select Add Physical Drive(s); then, click on OK.
A prompt appears requesting that you select from 1 to 3 Ready (RDY) drives to add to the existing array.
3. Click on the appropriate RDY drives. An X appears beside the selected drive.
4. Click on OK.
A screen similar to the following appears.
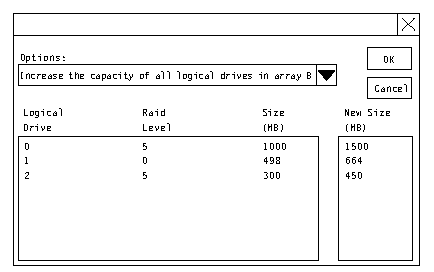
5. Select one of the available options for expansion from the pull-down list.
The screen shows a list of the affected logical drives with their new sizes.
6. Click on OK.
Physical Device Administration: This section contains instructions for setting physical device states and rebuilding drives using the ServeRAID Administration and Monitoring utility program.
Setting Physical Device States: Physical devices always appear in one of the following defined states, but you can easily redefine them into another state.
The following table shows the valid device states and valid alternative states.
|
Device States |
Alternate States |
|
EMP |
RDY SBY |
|
SBY |
RDY EMP HSP SHS |
|
DHS |
EMP HSP SHS |
|
SHS |
HSP DHS |
|
DDD |
ONL RBL |
|
RDY |
EMP HSP SHS SBY |
|
HSP |
RDY SHS DHS |
|
ONL |
DDD |
|
RBL |
DDD ONL |
1. Select the device from the Main Screen of the Administration and Monitoring utility program. A screen similar to the following appears.
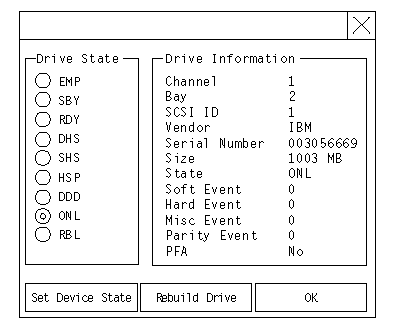
2. Click on the radio button that indicates the desired state.
|
Note |
Rebuilding Drives: When a hard disk drives goes defunct (DDD), a Rebuild operation is required to reconstruct the data for the device in its respective disk array. You can rebuild only RAID level 1 and RAID level 5 logical drives. The data stored in stored in RAID level 0 logical drives cannot be reconstructed; therefore, RAID level 0 logical drives are blocked.
After the rebuild process completes, you can unblock the RAID level 0 logical drives, which redefines their state as OKY and allows access to them once again. But remember, the RAID level 0 logical drive might contain damaged data. You must re-create, install, or restore the data for the RAID level 0 logical drive from the most recent backup disk or tape. (See "Unblocking Logical Drives" for more information.)
To rebuild a drive:
1. Click on the DDD device on the Main Screen of the Administration and Monitoring utility program.
2. Click on Rebuild Device.
A screen similar to the following appears.

3. Select a RDY drive on which to store the reconstructed data, or click on OK to use the same bay if you have physically replaced the drive.
|
Note |
Notes:
1. Only one Rebuild operation can take place at a time.
2. The Rebuild operation changes the hard disk drive state from DDD to RBL if the array contains a CRT logical drive. After the Rebuild operation completes, the hard disk drive state changes from RBL to ONL. (When you rebuild to a RDY drive, the DDD drive is removed from the array and the state of the DDD drive is changed to defunct hot-spare (DHS).)
3. If multiple hot-spare (HSP) drives are available, the ServeRAID controller searches all the bays on each channel for a hot-spare drive of the appropriate size and the first appropriate hot-spare drive found enters the Rebuild (RBL) state.
4. If a hot-spare (HSP) drive is available, a Rebuild operation starts automatically.
ServeRAID Controller Administration: This section provides instructions for copying the drive configuration to the ServeRAID controller, copying the ServeRAID controller configuration to the drives, initializing the ServeRAID controller configuration, and scanning for new drives.
Copying the Drive Configuration to the ServeRAID Controller:
 You can copy the configuration information stored on the hard disk drives to the ServeRAID controller. This procedure is useful when you install drives from other systems.
During the copy procedure, the ServeRAID controller automatically performs any necessary rearrangement of the configuration; then, the controller writes the new configuration information back to the reserved area on the configured hard disk drives.
To copy the drive configuration information to the ServeRAID controller:
1. Click on the  icon on the tool bar or select Adapter Configuration from the Advanced pull-down menu.
A screen similar to the following appears.
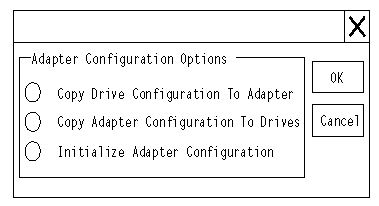
2. Select Copy Drive Configuration to Adapter; then, click on OK.
Copying the ServeRAID Controller Configuration to the Drives:

You can copy the configuration information stored in the ServeRAID controller to all configured hard disk drives.
To copy the ServeRAID controller configuration information to the drives:
1. Click on the  icon on the tool bar or select Adapter Configuration from the Advanced pull-down menu.
A screen similar to the following appears.
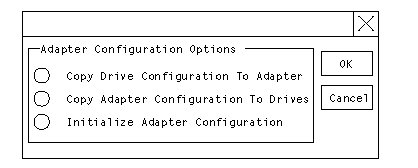
2. Select Copy Adapter Configuration to Drives; then, click on OK.
Initializing the ServeRAID II Controller:
 This procedure initializes the ServeRAID controller configuration by clearing all the logical drives and resetting all functional hard disk drives to RDY. This procedure is useful when you want to start over and create a new configuration.
|
Attention |
 icon on the tool bar or select Adapter Configuration from the Advanced pull-down menu.
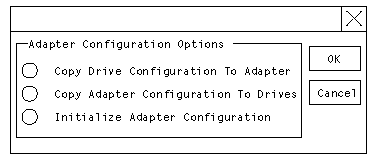
2. Select Initialize Adapter Configuration; then, click on OK.
Scanning for New Drives: This option enables you to locate new drives attached to the ServeRAID controller.
To scan for new drives:
Click on the  icon on the tool bar or select Scan For New Drives from the Advanced pull-down menu.
|
Search Keywords |
| |
|
Document Category |
Controllers | |
|
Date Created |
09-12-98 | |
|
Last Updated |
09-12-98 | |
|
Revision Date |
09-12-99 | |
|
Brand |
IBM PC Server | |
|
Product Family |
Netfinity 5500 | |
|
Machine Type |
8660 | |
|
Model |
ALL | |
|
TypeModel |
| |
|
Retain Tip (if applicable) |
| |
|
Reverse Doclinks |