
|
45.072 bytes |
Product Information |
Document ID: MCGN-46BSJC |
Netfinity EXP15 - Replacing rails
Applicable to: World-Wide
Source: Hardware Maintenance Manual
Replacing Rails
1. Align the rail assembly (provided with the hardware kit) to the rear of the rack.
a. Install two black hex head screws 1 in the top and bottom positions, starting with the top.
b. Loosely tighten the screws.
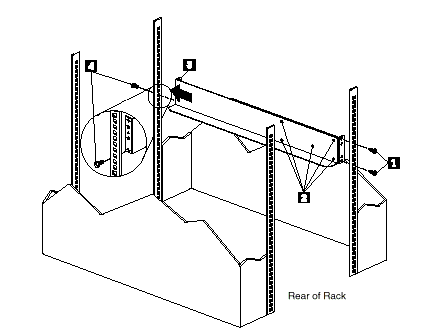
2. Loosen the five screws (four large screws and one small screw) 2 located on the interior of the rail assembly; then slide the front rail assembly forward 3 until it makes contact with the front rack rail.
|
Note |
3. From the front of the rack, thread one (black) hex head screw 4 into the bottom position of the rail assembly and tighten firmly.
|
Note |
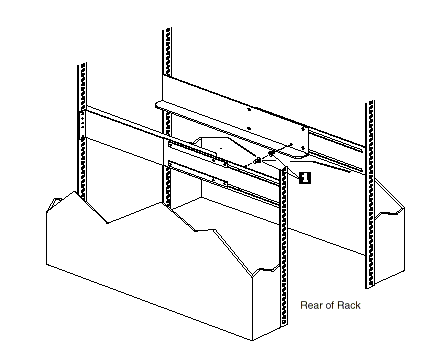
6. Remove the two small 6-32 screws 1 on the interior side of the rails. Save these screws to install the Expansion Unit.
|
Search Keywords |
| |
|
Document Category |
Diagrams | |
|
Date Created |
25-03-99 | |
|
Last Updated |
21-05-99 | |
|
Revision Date |
| |
|
Brand |
IBM PC Server | |
|
Product Family |
Rack/Storage Enclosures | |
|
Machine Type |
3520 | |
|
Model |
ALL | |
|
TypeModel |
| |
|
Retain Tip (if applicable) |
| |
|
Reverse Doclinks |