

|
192.165 bytes |
Service Hints & Tips |
Document ID: MNOK-3ZXRBH |
Aptiva - 2136 Removals and replacements - Bay 4 (3.5-In. FDD Bay)
Applicable to: World-Wide
- Disconnect the cables (note location of cables).
- Press the lever and rotate outward.
- Pull carefully and slowly as soon as the warning arrow appears.
- The drive frame becomes free after the line behind the arrow appears. Remove the frame from the chassis.
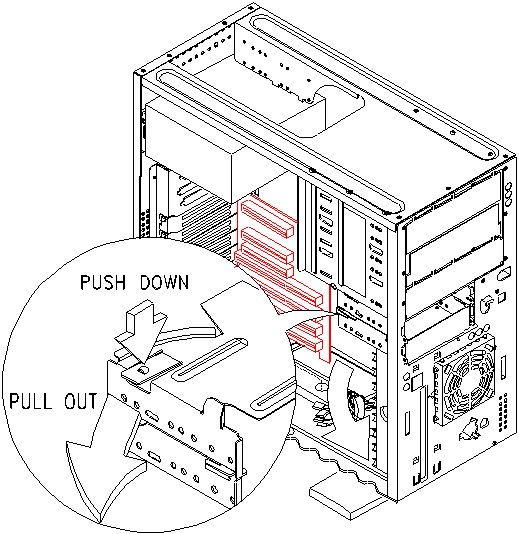
Figure 4- 6 Bay 4 (3.5-In)
- Remove the screws for the drive, then you can pull the old drive out.
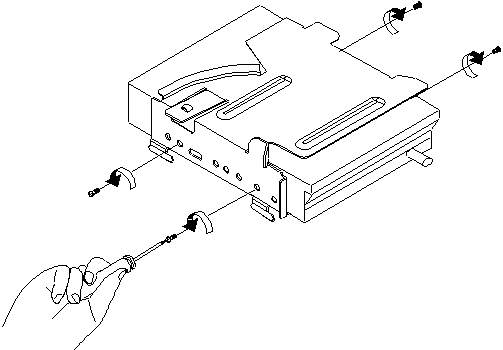
Figure 4- 7 Remove the Screws
- If upper and lower frame needs to be detached, please refer to figure 4-8.
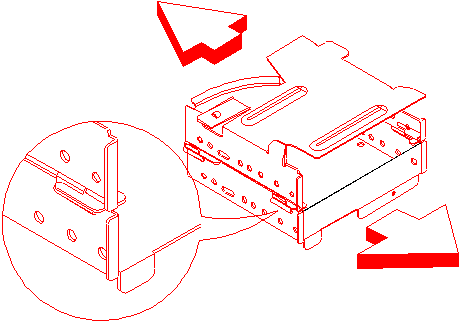
Figure 4- 8 Detach Diskette Drive Frame
Note: If you want to install another 3.5-inch drive, such as a hard disk drive, see the procedure in "Bay 5 (3.5-In. Internal Bay)". Otherwise, proceed to following steps for re-install.
- Attach the upper drive frame back to the lower drive frame and click it into place.
- Insert the drive frame into the 3.5-inch drive bay and click it into place.
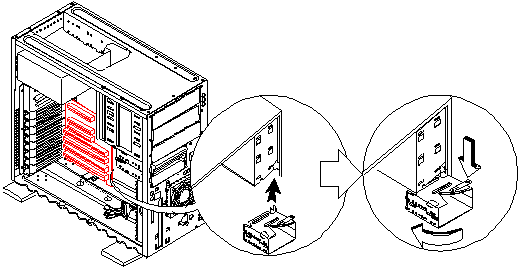
Figure 4- 9 Reattach the 3.5-inch drive
- Re-attached the power and signal cables to the drive.
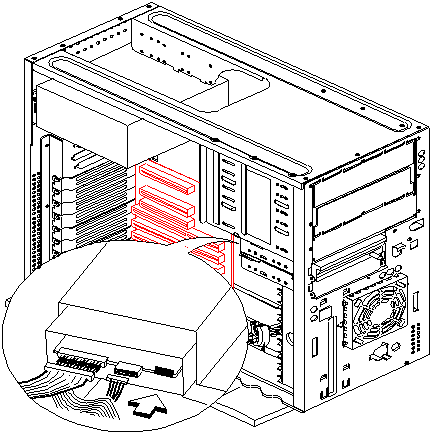
Figure 4- 10 Reattached The Cables
|
Search Keywords |
| |
|
Hint Category |
Hardware Installation/Configuration, Diskette Drives, Hard Drives | |
|
Date Created |
05-11-98 | |
|
Last Updated |
08-01-99 | |
|
Revision Date |
08-01-2000 | |
|
Brand |
IBM Aptiva | |
|
Product Family |
Aptiva | |
|
Machine Type |
2136 | |
|
Model |
All | |
|
TypeModel |
| |
|
Retain Tip (if applicable) |
| |
|
Reverse Doclinks |