
|
207.585 bytes |
Service Hints & Tips |
Document ID: MNOK-3T6R3E |
Aptiva - How to change hard drive power cables
Applicable to: World-Wide
2134, 2144 models (desktop)
Remove cover from computer:
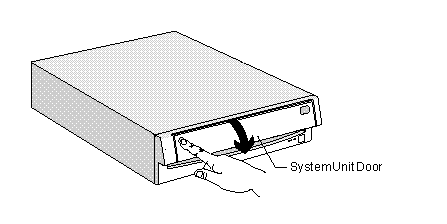
Push in on the door - Pull out on the cover.
The hard drive is located underneath the CD ROM drive. As you face the computer, it is in the front right area of the computer.
The power cables contain four wires: two black, one yellow, and one red, terminating in a white plug. Locate these cables at the rear of the CD ROM drive and the hard drive beneath it. Pull the white plugs straight out toward the rear of the computer. Swap the power cables between devices and ensure that they are securely seated into their sockets. Replace cover and test operation of computer.
2161, 2159, 2162, 2168 models (tower)
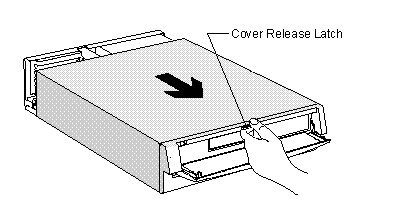
Remove cover from computer:
Remove the screws - Pull out on the cover.
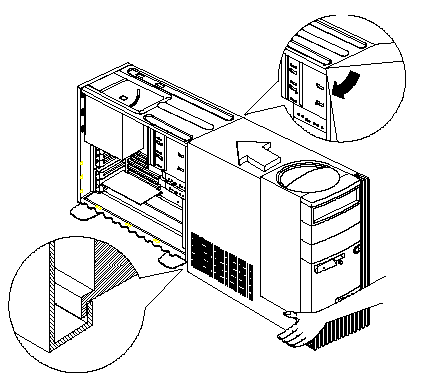
The hard drive is located at the rear top of the computer. It sits on top of the power supply.
The power cables contain four wires: two black, one yellow, and one red, terminating in a white plug. Locate this cable at the end of the hard drive closest to the front of the computer. Pull this cable out by gripping the white plug and pulling toward the front of the computer.
Locate one of the unused power cables that are in the same area and install it into the hard drive. Ensure that it is seated securely into it socket.
2136, 2137, 2138 models (tower)
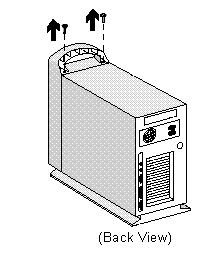
Remove cover from computer:
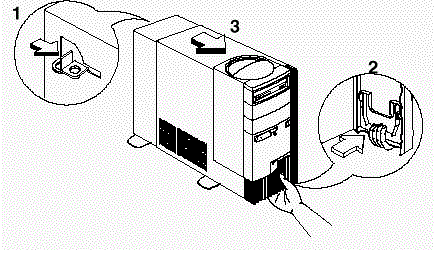
1. Release the lock that secures the cover at the back of the unit by pressing it toward the unlocked icon.
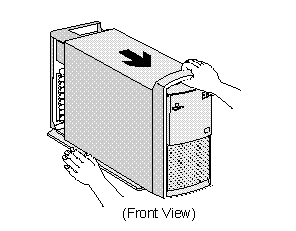
2. Slip your hand into the underside of the front panel and pull the release handle forward to release the cover.
3. The cover slides along grooves that run on the sides of the unit. While still holding the handle, slide the cover forward to remove it completely.
4. Touch the bare metal frame of the system to dissipate any static electricity from your body (do not touch any of the components inside the frame until you have done this). Do not touch any component(s) with a voltage warning label.
The hard drive is located underneath the CD ROM drive. As you face the computer, it is in the front right area of the
computer.
The power cables contain four wires: two black, one yellow, and one red, terminating in a white plug. Locate these cables at the rear of the hard drive. Pull the white plugs straight out toward the rear of the computer.
Locate one of the unused power cables that are in the same area and install it into the hard drive. Ensure that it is seated securely into its socket.
NOTE: Replacing the Cover
1. Align the end corners of the cover with the front corners of the chassis. Ensure that the rails of the cover slides along the grooves on the sides of the chassis.
2. Slide back the cover until it fits in place. If the cover does not slide all the way to the rear, hold the upper rear corners of the cover and slightly press it inward while pushing it toward the rear end of the unit.
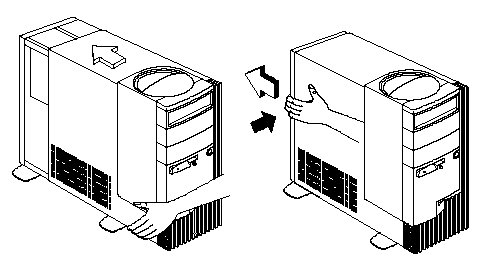
3. Slide the lock on the back of the unit to the locked icon to secure the cover to the chassis.
2140, 2142 models (tower)
Pull out on the rear tab to release the side service panel.
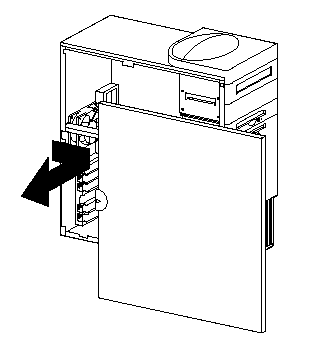
The hard drive is located in the front area of the computer.
The power cables contain four wires: two black, one yellow, and one red, terminating in a white plug. Locate these cables at the rear of the hard drive. Pull the white plugs straight out toward the rear of the computer.
Locate one of the unused power cables that are in the same area and install it into the hard drive. Ensure that it is seated securely into its socket.
|
Search Keywords |
| |
|
Hint Category |
Hardware Installation/Configuration, Hard Drives | |
|
Date Created |
02-04-98 | |
|
Last Updated |
09-12-98 | |
|
Revision Date |
07-12-99 | |
|
Brand |
IBM Aptiva | |
|
Product Family |
Aptiva | |
|
Machine Type |
2134, 2136, 2137, 2138, 2140, 2142, 2144, 2159, 2161, 2162, 2168, 2176 | |
|
Model |
all | |
|
TypeModel |
| |
|
Retain Tip (if applicable) |
| |
|
Reverse Doclinks |