

|
587.543 bytes |
Service Hints & Tips |
Document ID: MNOK-3QYV6B |
Aptiva - 2140/2142 - Using Aptiva Product Recovery CD
Applicable to: World-Wide
Original IBM Aptiva PC Software
The original IBM Aptiva PC software is a complete backup of all software originally loaded on your Aptiva PC's hard disk.
This CD-ROM program is for backup purposes only. It may be used only with an International Business Machines Corporation Aptiva Personal Computer system. This disc will not function on other computer systems. The backup software included on this CD-ROM was pre-installed on your hard disk at the factory.
Product support for the software products contained on the Aptiva Product Recovery CD-ROM is provided by IBM.
Note: Use of this software may result in the loss of data from your hard disk. To prevent data loss, it is recommended that you maintain a current backup of all non-preloaded software and data files.
Using the IBM Aptiva Product Recovery CD-ROM
To use the Product Recovery CD ROM, follow these instructions:
1. Make sure your computer is turned ON.
2. Insert the IBM Aptiva Product Recovery CD-ROM in your CD-ROM drive.
3. Shut down the operating system and turn off your computer. Wait for the power light to turn OFF.
4. Turn ON your computer.
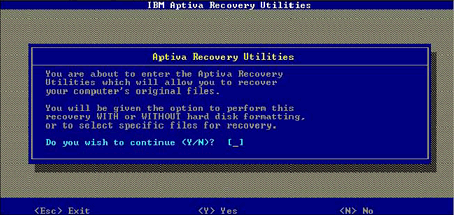
Figure 1
5. When you see (Figure 1) the prompt "Do you wish to continue (Y/N)?" press "Y" and "Enter".
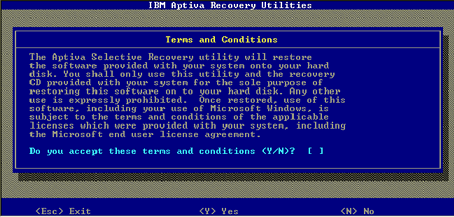
Figure 2
6. When you see (Figure 2) the prompt "Do you accept these terms and conditions (Y/N)?" press "Y" and "Enter".
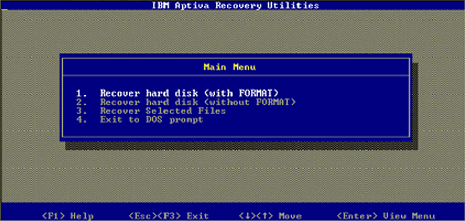
Figure 3
7. When you see (Figure 3) the Aptiva Recovery Utilities main menu, select the type of recovery process you want to complete. For more information on the types of recovery processes, press the F1 key from the main menu. Follow the instructions on the screen to complete the recovery process.
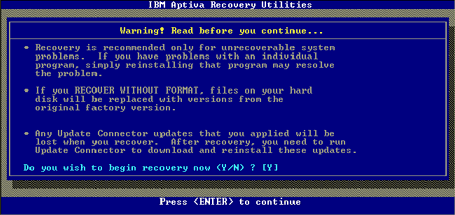
Figure 4
A. Recover hard disk (with FORMAT) - will erase all data from the hard disk before restoring the entirety of the original preload. When you see (Figure 4) the prompt "Do you wish to begin recovery now (Y/N)?" press "Y" and ENTER.
B. Recover hard disk (without FORMAT) - will NOT erase any data from the hard disk, but it will overwrite the entirety of the original preload. When you (Figure 4) see the prompt "Do you wish to begin recovery now (Y/N)? press 'Y' and ENTER.
C. Recover Selected Files - allows you to restore individual files or directories from the original preload.
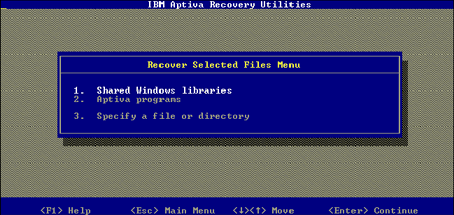
Figure 5
"Shared Windows Libraries" - allows you to restore all of the dynamic link library (.DLL) files to the C:\Windows\System directory (Figure 5).
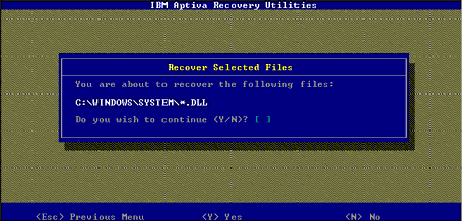
Figure 6
1. When you see (Figure 6) the prompt "Do you wish to continue (Y/N)?" press "Y".
2. Press "ALT" + "F" + "X".
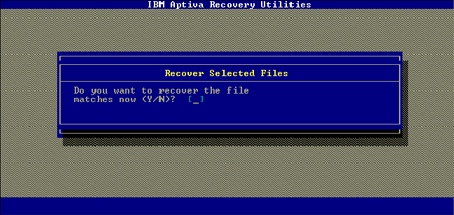
Figure 7
3. When you see (Figure 7) the prompt "Do you want to recover the file matches now (Y/N)?" press "Y".
"Aptiva Programs" - allows you to restore the C:\IBMTOOLS directory.
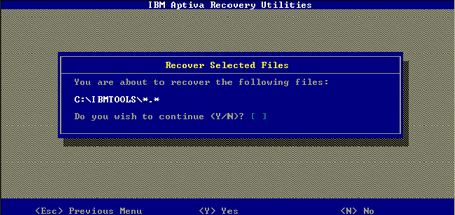
Figure 8
1. When you see (Figure 8) the prompt "Do you wish to continue (Y/N)?" press "Y".
2. Press "ALT" + "F" + "X".
3. When you see (Figure 9) the prompt "Do you want to recover the file matches now (Y/N)?" press "Y".
"Specify a file or directory" - allows you to select the files and/or directories you wish to restore.
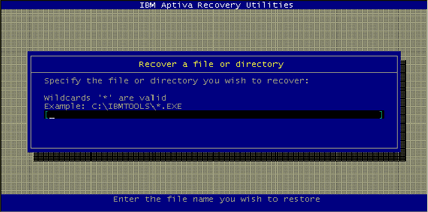
Figure 9
1. When you see the prompt "Specify the file or directory you wish to recover:" type the full path to the
directory or filename. Wildcards (*) may be used.
2. When you see the prompt "Is this correct (Y/N)?" press "Y".
D. Exit to DOS prompt - allows to escape to a DOS prompt.
8. After the software recovery is complete, remove the Aptiva Product Recovery CD-ROM from your CD-ROM drive and press CTRL+ALT+DEL to restart your computer.
|
Search Keywords |
| |
|
Hint Category |
Software Installation/Configuration | |
|
Date Created |
23-01-98 | |
|
Last Updated |
10-12-98 | |
|
Revision Date |
10-12-99 | |
|
Brand |
IBM Aptiva | |
|
Product Family |
Aptiva | |
|
Machine Type |
2140, 2142 | |
|
Model |
L17; L27; L31; L35; L37; L3F; L45; L47; L51; L5H; L61; L6D; L71; LG1; LG2; LQ1; LQ2; LQ3; LV1; LV2; SQ1; SQ2; S34; S35; S36; S44; S45; S46; S57; S61; S62; S67; S6F; S6H; S6S; SG1; SG2; SQ1; SQ2; SV1; SV2 | |
|
TypeModel |
| |
|
Retain Tip (if applicable) |
| |
|
Reverse Doclinks |