
|
118.658 bytes |
Service Hints & Tips |
Document ID: COBN-3HABSD |
TP 380,385 - LCD panel removal diagram
Applicable to: World-Wide
The following information is intended for IBM Dealers and Authorized Servicers only. Customers attempting to follow any of the procedures below may void their warranty.
1130 LCD Panel
Battery Pack (1010)
DIMM Cover (1020)
Keyboard Unit (1030)
CD-ROM/FDD Assembly (1040)
LCD Unit (1070)
LCD Front Cover (1120)
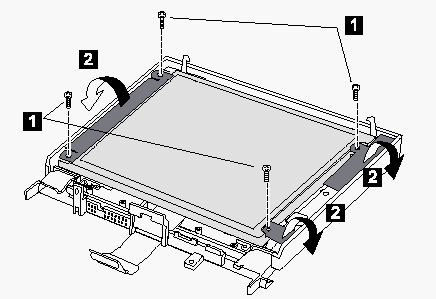
DSTN LCD Panel
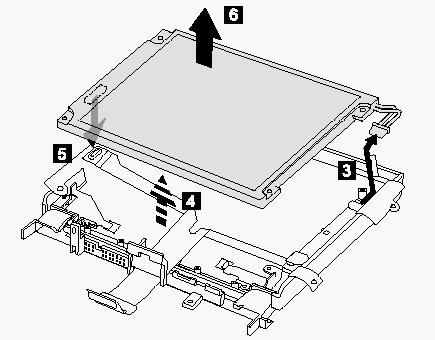
Note: In step 4, lift the LCD panel a little to disconnect the flexible cable in step5.
|
Step |
Location (Quantity) |
Length |
|
1 |
LCD panel (4) |
M 2.5 x 6mm |
|
Note: When replacing, make sure you use the correct screw. |
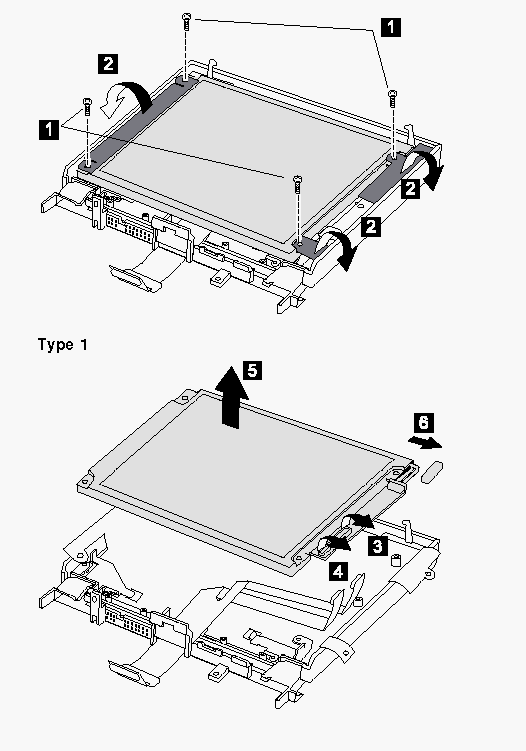
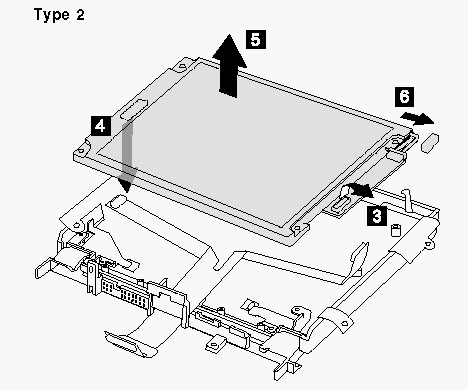
TFT LCD Panel
|
Step |
Location (Quantity) |
Length |
|
1 |
LCD panel (4) |
M 2.5 x 6mm |
|
Note: When replacing, make sure you use the correct screw. |
|
Search Keywords |
| |
|
Hint Category |
Hardware Maintenance Information | |
|
Date Created |
21-05-97 | |
|
Last Updated |
19-08-98 | |
|
Revision Date |
17-08-99 | |
|
Brand |
IBM ThinkPad | |
|
Product Family |
ThinkPad 380, ThinkPad 380D, ThinkPad 380E, ThinkPad 380ED, ThinkPad 385D, ThinkPad 385E, ThinkPad 385ED | |
|
Machine Type |
2635 | |
|
Model |
Various | |
|
TypeModel |
| |
|
Retain Tip (if applicable) |
| |
|
Reverse Doclinks |