
|
422.776 bytes |
Service Hints & Tips |
Document ID: PMYS-3LBSBH |
Aptiva - How to record and activate an outgoing message in Communication Center
Applicable to: World-Wide
1. Open Communication Center:
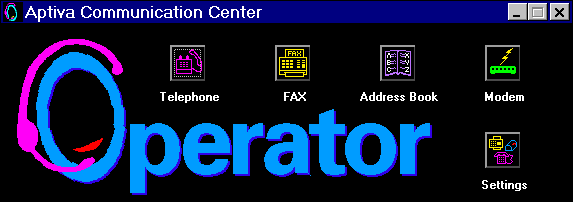
In Windows 95: At the Windows 95 Desktop, click "Start", "Programs", "Aptiva Productivity", "Aptiva Communications Center" Operator. Click on the "Telephone" icon in "Operator."
In Windows 3.1: In "Program Manager," double-click "Aptiva Productivity," "Aptiva Communication Center," and "Operator." Click on the "Telephone" icon in "Operator."
In OS/2: At the OS/2 Desktop, double-click "Aptiva Productivity," "Aptiva Communication Center," and "Operator." Click on the "Telephone" icon in "Operator."

Figure 1 - Operator Screen
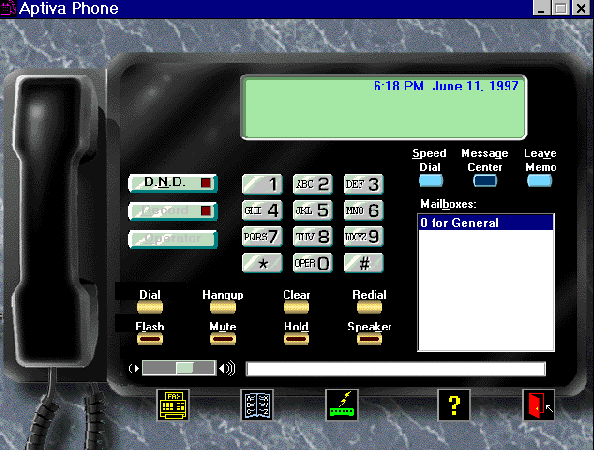
2. In "Aptiva Phone," double-click "0 for General" in the white "mailboxes" box.

Figure 2 - Aptiva Phone
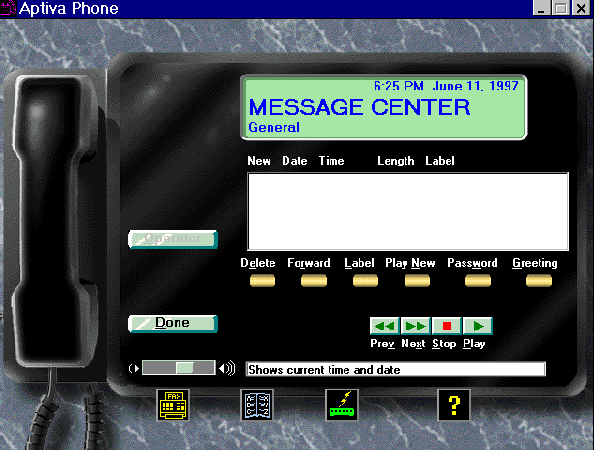
3. In the "Message Center," Left click on the gold "Greeting" button at the right.

Figure 3 - Message Center
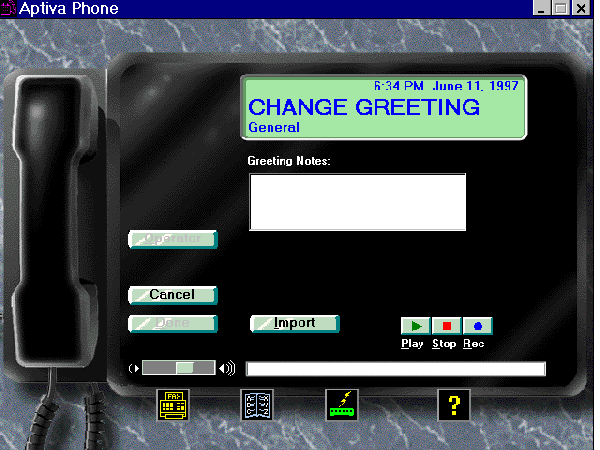
4. In the "Change Greeting" screen, you can record and/or play an outgoing telephone greeting. By selecting the green "Play" button, you can play the existing greeting, or a newly created greeting.
To record a new greeting, click on the blue "Record" button, wait a couple of seconds until you hear a short beep, then speak your message into the microphone. When completed, click on the red "Stop" button. Click "Play" to listen. Repeat process until satisfied with the outgoing message. Some customers prefer to write out a message before recording it. When completed, click "Done," "Done," to get back to the "Aptiva Phone."
The new outgoing message will now be played for any incoming calls that are not manually answered within the specified number of rings.

Figure 4 - Change Greeting
|
Search Keywords |
| |
|
Hint Category |
Communications Software, Software Installation/Configuration | |
|
Date Created |
26-08-97 | |
|
Last Updated |
08-12-98 | |
|
Revision Date |
08-12-99 | |
|
Brand |
IBM Aptiva | |
|
Product Family |
Aptiva | |
|
Machine Type |
2134, 2144, 2168, 2176 | |
|
Model |
9W2; 932; 132; 142; 154; 162; 163; 172; 182; 152; LL1; L10; K10; LL3; L30; K30; LL5; L50; K50; LL2; L20; K20; KU6; LL4; L40; K40; KU4; LL6; L60; K60; L15; L16; K25; K26; L43; K43; L45; K45; KU5; L55; K55; L65; K65; L66; K66; U15; U16; L33; K33; L35; K35; U33; U35; W37; W47; N30; N40; N50; N60; N41; N51; N61; N71; S20; S55; S65; S64; S74; S75; S50; X10; Y10; Z10; X20; Y20; Z20; X30; Y30; Z30; X40; Y40; Z40; X37; X47; Y37; Y47; Z37; Z47; X17; X27; Y17; Y27; Z17; Z27; 352; 354; 355; 357; 364; 362; 363; 372; 374; 381; 442; 447; 451; 454; 382; 384; 392; L01; K01; P01; L21; K21; P21; L22; K22; P22; L23; L31; L32; L52; L6T; P23; P31; P32; P52; K23; K31; K32; K52; L53; L62; P53; P62; K53; J62; K74; Y04; X01; Y01; Z01; X31; Y31; Z31; X03; Y03; Z03; X34; Y34; Z34; X63; Y63; Z63; X35; Y35; Z35; X61; Y61; Z61; X33; Y33; Z33; X65; Y65; Z65; X71; Y71; Z71; W33; W55; W65; V34; T34; V65; T65; V71; T71; T63; H54; H56; H55; H5E; H5F; H64; H65; J31; J33; J35; JDA; JCL; J3K; J3L; J3A; JSN; J3C; J3E; J3X; J3Y; J3Z; J3V; J3W; J51; J52; H6D; H6E; H6F; H7E; H7F; H7G; T71; T65; T62; T33; T01; T34; T63; C23; C31; C32; C33; C35; C3X; C53; C55; C5X; C65; C66; C67; C6B; C6D; C6E; C6X; C6Y; C73; C77; C7X; 6R8; 6R9; 7R0; 7R1; 7R2; 7R3; 7R6; 7R7; 7R9; 8R1; 8R6; 8R8; 9R3; 9R4; 9R5; 9R6; F23; F31; F32; F33; F35; F67; F6B; M40; M41; M53; M54; M55; M56; M57; M58; M60; M61; M62; M70; M71; M72; M91; A40; A44; A45; A50; A51; A52; A90; A92; A94; 2R6; 3R5; 4R2; 4R7; 2R9; 3R3; 3R1; 4R8; 3R0; 3R7; 4R0; 4R9; 3R8; 3R9; 4R3; 5R5; C40; C41; C45; C53; C61; C21; 6R6; M30; M31; M35; M50; M51; M52; M63; A10; A12; A14; 2R0; 2R3; 2R0; 2R3; 2R5; 2R7; 2R8; 3R4; 3R6; 4R1; 5R1; 6R3; C30; C31; C51 | |
|
TypeModel |
| |
|
Retain Tip (if applicable) |
| |
|
Reverse Doclinks |