
|
522.509 bytes |
Parts Information |
Document ID: DDSE-42CSGU |
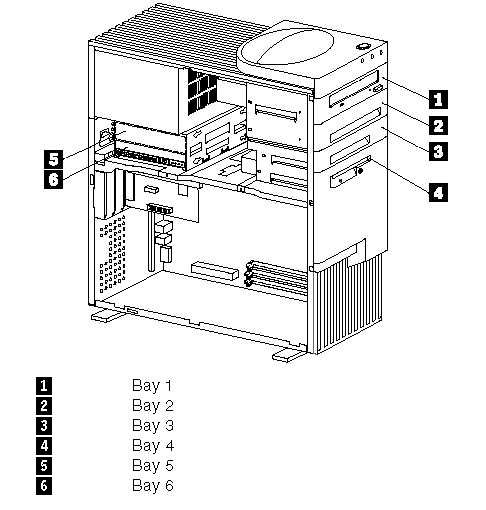
Netfinity 3000 - Working with Drives in Bays 1 through 4
Applicable to: World-Wide
Working with Drives in Bays 1 through 4:
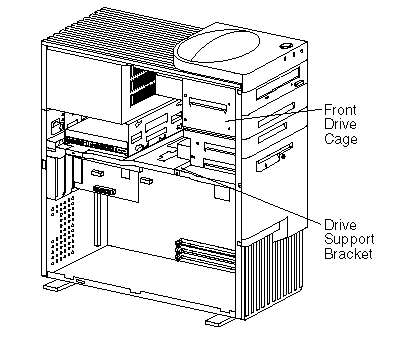
There are two different designs for the front drive cage that contains drive bays 1 through 4. One design has a drive
cage that must be removed when you install or remove drives. With the other design, you install drives from the front of the server without removing the drive cage. In this type, the drive cage is permanently mounted to the chassis and cannot be removed. To determine which type of chassis you have, look for the support bracket and screw that secure the front drive cage. If the chassis does not have these components, you have the permanently mounted drive cage. The procedure for installing and removing drives is different for each type of chassis.
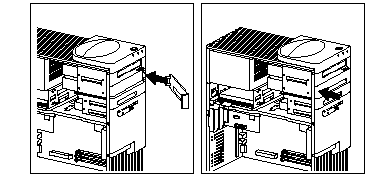
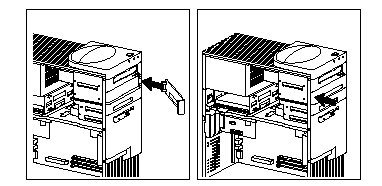
The following illustration shows the server bays.
|
Note |
|
Attention |
|
Note |
|
Note |
2. If knockouts are present in the drive bay opening, twist them with a screwdriver or pliers to remove.
The following illustration shows the type of knockout in bays 2 and 3.
3. Install the drive in the bay opening and secure the drive by inserting screws.
|
Note |
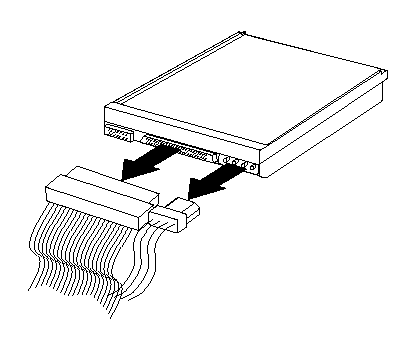
4. Attach the cables to the drive. See "ISA and PCI Adapters" for an illustration that shows the locations of the connectors on the riser card.

5. If the installed drive has nonremovable media, replace the bay panel.
6. If you installed a CD-ROM drive and want to connect the drive to the CD-ROM audio connector, see "ISA and PCI Adapters" to locate the CD-ROM audio connector on the riser card.
7. If you want to install or remove any other options, do so now. Otherwise, go to "Completing the Installation".
Removing Drives in the Permanently Mounted Drive Cage:
This procedure is for those servers that have a permanently mounted front drive cage.
1. If the drive being removed has nonremovable media, remove the bay panel.
a. Locate the appropriate bay panel in the front of the server.
b. Use the tip of a screwdriver, if necessary, to release the plastic tabs that hold the bay panel at the front
of the server.
c. Remove the bay panel.
2. Disconnect the cables from the drive that you want to remove.
3. Remove the visible screws that hold the drive and slide it out the front of the server.
4. If you are not installing another drive, replace the bay panel.
5. If you want to install or remove any other options, do so now. Otherwise, go to "Completing the Installation".
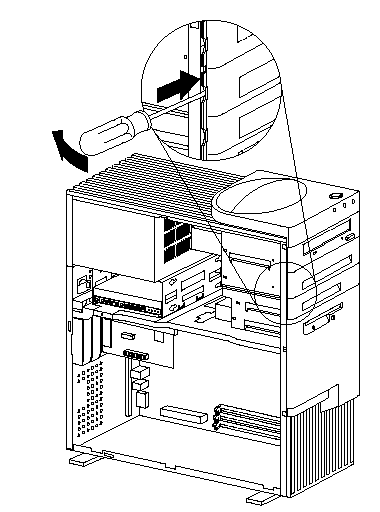
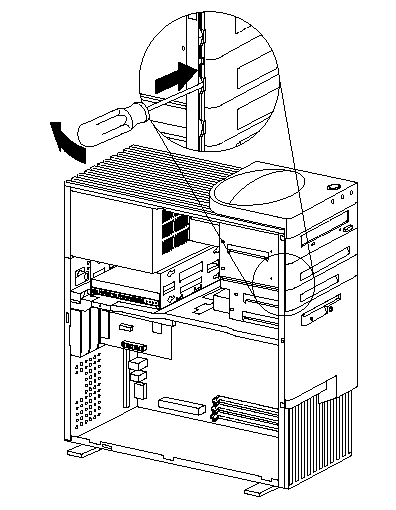
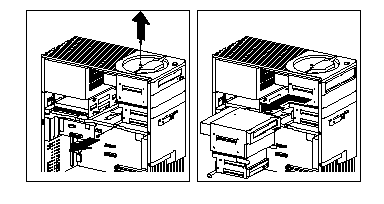
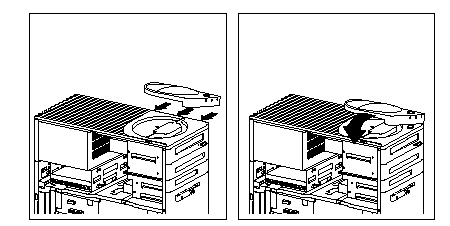
Removing the Removable Drive Cage: The following illustration shows a chassis with a drive-support bracket and a removable drive cage. The front drive cage is also known as the upper drive cage.
To remove the drive cage:
1. Disconnect any cables that are connected to drives in bays 1 through 4.
2. Remove the top-handle cover and set it aside.
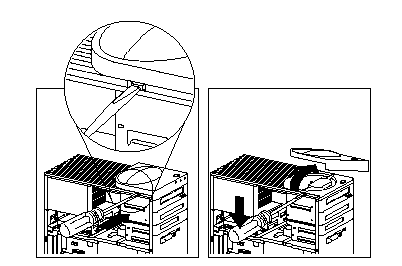
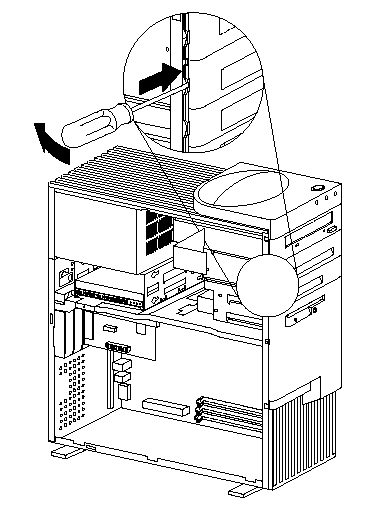
3. Remove the top-handle screw and the screw from the drive-support bracket that holds the upper drive cage in place. Then, move the drive cage towards the power supply until it stops, and lift it out of the server.
Installing a Drive in the Removable Drive Cage:
This section gives the procedure for installing drives in the upper drive cage. If you want to remove a drive from the
upper drive cage, reverse the order of the following steps.
|
Note |
2. Touch the static-protective package containing the new drive to any unpainted metal surface; then, remove the drive from it.
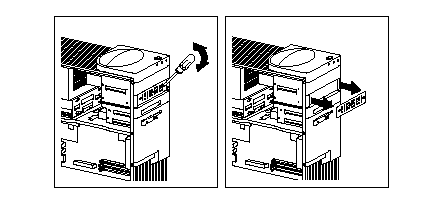
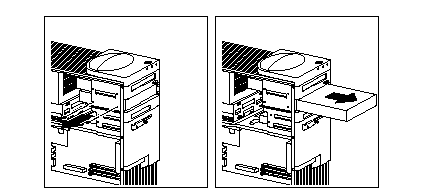
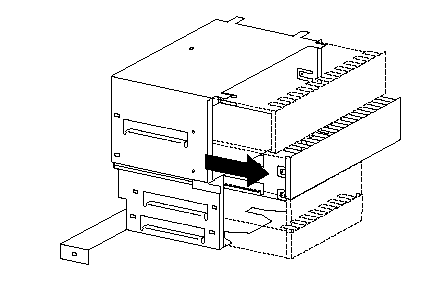
3. Insert the drive into the desired unoccupied drive bay. Insert and tighten the screws that hold it in place. The following illustration shows a hard disk drive being installed in bay 2.
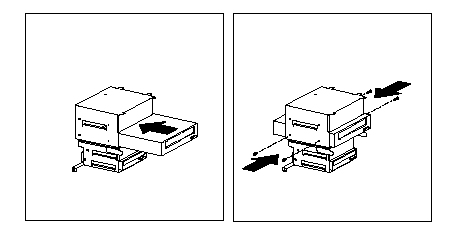
4. Insert the drive cage and slide it to the right until it stops at the front of the server; be sure that the screw holes in the drive cage are aligned with the screw holes in the support bracket.
5. Insert and tighten the screw that secures the drive cage at the side; then, tighten the screw on top near the handle.
6. Replace the top-handle cover.
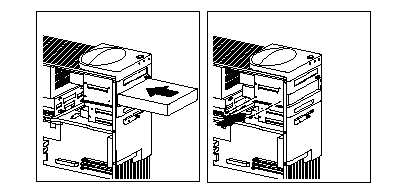
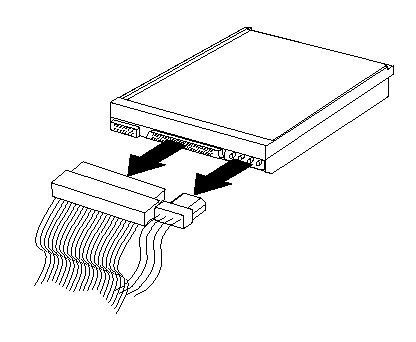
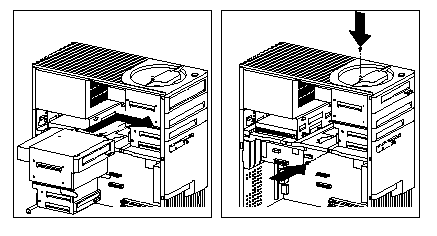
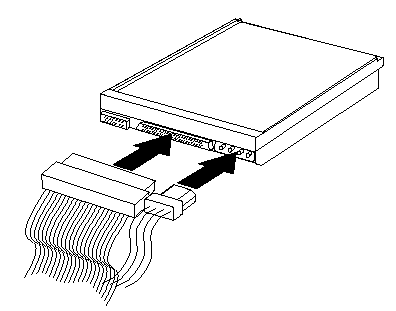
7. Attach the cables to the drive, as shown in the following illustration.
8. If you have installed a drive with removable media, you must remove the bay panel. If you have installed a drive with nonremovable media, you must install a bay panel (if it was not already installed).
- To remove a bay panel, go to step 9.
- To install a bay panel, go to step 10.
9. To remove a bay panel:
a. Locate the appropriate bay panel in the front of the server.
b. Use the tip of a screwdriver, if necessary, to release the plastic tabs that hold the bay panel at the front of the server.
c. Remove the bay panel.
d. Continue with step 11.
10. To install a bay panel:
a. Align the right-hand edge of the bay panel with the matching opening in the front of the server.
b. Gently press the left edge closed until it snaps.
c. If you installed a CD-ROM drive and want to connect the drive to the CD-ROM audio connector, see "ISA and PCI Adapters" to locate the CD-ROM audio connector on the riser card.
d. Go to "Installing a Drive in the Removable Drive Cage".
11. If you want to install or remove any other options, do so now. Otherwise, go to "Completing the Installation".
|
Search Keywords |
| |
|
Document Category |
Hard Drives | |
|
Date Created |
18-11-98 | |
|
Last Updated |
23-11-98 | |
|
Revision Date |
18-11-99 | |
|
Brand |
IBM PC Server | |
|
Product Family |
Netfinity 3000 | |
|
Machine Type |
8476 | |
|
Model |
ALL | |
|
TypeModel |
| |
|
Retain Tip (if applicable) |
| |
|
Reverse Doclinks |